Hello friends! In this article, I will tell you how we can root the Infinix GT 10 Pro. I will show you the right path. You just have to follow the steps carefully. I have shown you the ways in which you can easily root your phone without any interruptions. I am saying this to you because rooting an Android phone is a complicated process. But you don’t have to worry at all; just follow the methods given below, and you will be able to root your Infinix GT 10 Pro easily.
What is root?
Rooting an Android device refers to the process of obtaining administrative privileges or superuser access to the Android operating system. and by default, regular users have limited access to certain system functions and directories to ensure security and stability. When you root your device, you gain full control over the system.
By rooting your Infinix GT 10 Pro, you can customize your device and access and modify files, settings, and apps that are normally restricted to regular users. However, rooting may void your warranty and put your device at risk if you’re not careful during the process.
Advantages or Benefits of rooting
Rooting provides lots of advantages; let’s discuss some of them:
- Performance enhanced: with root access, you can boost your device’s performance. By removing unused apps, optimizing CPU performance, and applying performance-enhancing mods, you can increase your device’s performance.
- Full Control Access: When you root your Android device, you have complete control over all the applications and system settings of your phone. This allows you to uninstall applications, access system files, and increase stability.
- Customization: Rooting gives you access to any kind of customization. Like system modification, UI modification, and theme modification, to your Android device.
- Increase battery health: You can maximize your device’s battery health by using super power-saving mode and installing a battery optimization app, which can enhance your battery health.
Disadvantages or Cons of Rooting
Rooting has many advantages, but it also has some disadvantages. Let’s discuss some cons:
- Voiding warranty: That’s a major risk; rooting your device voids your warranty, and if you are not careful at rooting, then your device may have some risks.
- Software Updates: After rooting, your device will stop getting official updates. so it doesn’t get the latest security updates and fixes.
- System issues: While rooting, you may face system issues and technical issues with the device that may not be compatible with you.
- Risk of bricking: In the process, if something goes wrong, there is a risk of damaging your device. This can completely damage your device, and you may have to spend a lot to repair it.
Pre Requirements:
Data Backup: There’s a chance of data corruption, so it’s important to keep your device’s data in a safe place.
Battery charge: Make sure your device has more than 80% charge. Otherwise, your device’s battery may drain completely.
Device version check: Before rooting, check your device’s model number and version because you will need to download the correct rooting method and files for your device.
Internet access: Keep in mind that while rooting, you will need internet access to download the unlock tool and other things.
Correct USB Drivers and Cable: Install the correct USB drivers for your device on your PC And choose an original USB Cable. This will help you connect your phone to the PC properly.
Let’s Root Infinix GT 10 Pro ~ using Magisk
In this article, we have discussed three methods of rooting your Infinix GT 10 Pro:
Method #1: Using the TWRP Custom recovery Method #2: Using Fastboot and ADB Method #3: Root Infinix GT 10 Pro Without PC Let’s root your Redmi 12 5G without any delay, but before rooting, it is necessary to fulfill the pre-requisites.
Warning:– Rooting your device may void your warranty and have some security risks. So root your device at your own risk.
Method #1: Using the TWRP Custom recovery
There are some simple ways to root the Infinix GT 10 Pro using the TWRP custom recovery.
Step 1: Unlock the bootloader
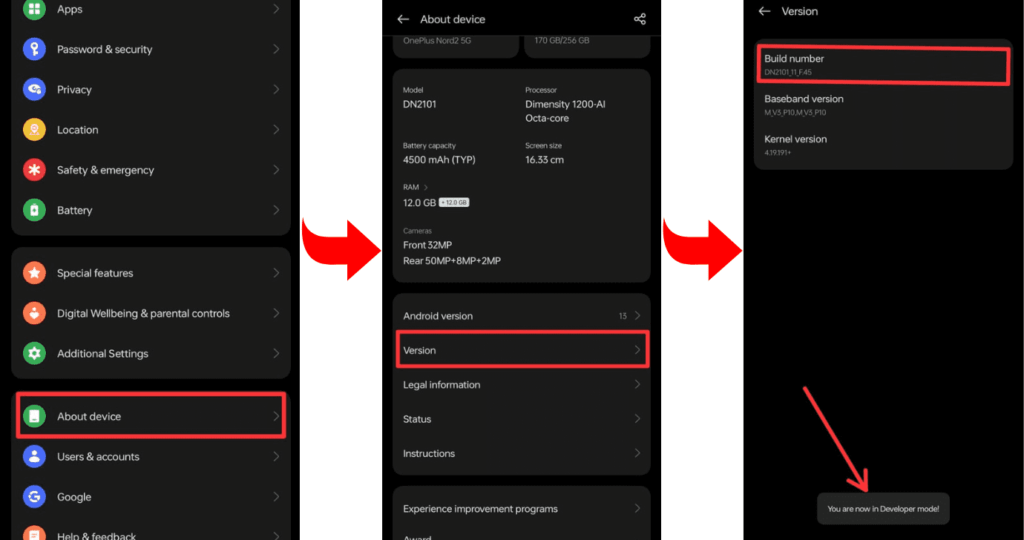
- Enable the developer option: First of all, open the device settings, go to “About Phone,” and then tap on the “Build number” option several times so that “Developers mode” is enabled.
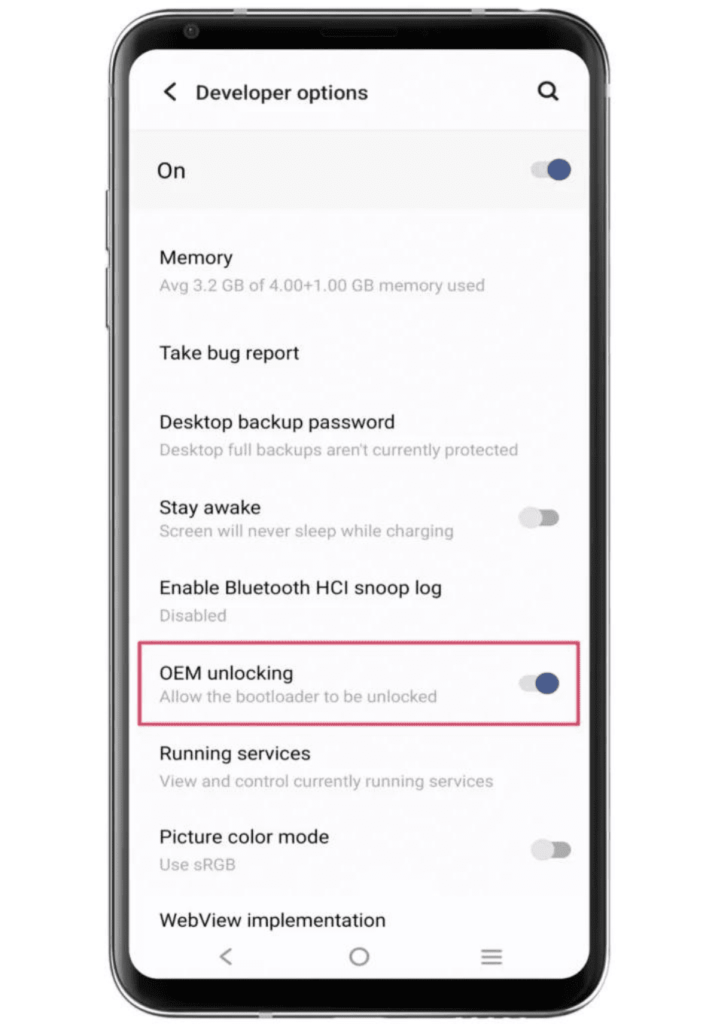
- Go to Settings and select Developers. Now find the options “OEM Unlocking” and “USB Debugging” and enable them.

- Boot the phone into bootloader mode to unlock the bootloader.
- Connect the phone to the computer using a USB cable.
- Type the command “fastboot oem unlock” in the terminal.
bootloader will now be unlocked on your Infinix GT 10 Pro.
Step 2: Install and flash TWRP custom recovery
- Download the file: First of all, go to the TWRP official website and download the TWRP recovery file for your phone, according to the model and brand of your phone. The file can be a string or in “img” format.
- Boot your phone into bootloader mode: To enter bootloader mode, you can press and hold the Power button and Volume Down button of your phone simultaneously. After that, you have to select the option “Bootloader” or “Fastboot” by using the Volume Up/Down button.
- Flashing TWRP Recovery: After getting your phone into Fastboot mode, use a USB cable and connect it to your computer.
- Flash the recovery: Now, open the flashing tool on your computer and select the TWRP recovery file on your phone. Select the appropriate option to flash the file, and wait for the process to complete.
The recovery will be flashed successfully. After that, you can restart your phone and enter TWRP recovery to backup and restore your phone’s settings and system in text mode.
If you’re rooting your device for the first time, you’ll need a TWRP installation guide.
Step 3: Get the correct Magisk Zip
After completing the TWRP recovery installation process on your phone, you are ready to flash Magisk files. In this part, you will get the most recent version, which will give you systemless root access right away.
You can get the Magisk software and Magisk zip file from the previous section, and then follow the instructions to gain those unrivaled rooting privileges.
Step 4: Root Infinix GT 10 pro using Magisk Zip
Let’s assume that you have already downloaded the zip file archive from the first step. Now we will move on to the Magisk flashing process. Here are some basic instructions from the user guide:
- Start by booting TWRP Custom Recovery.
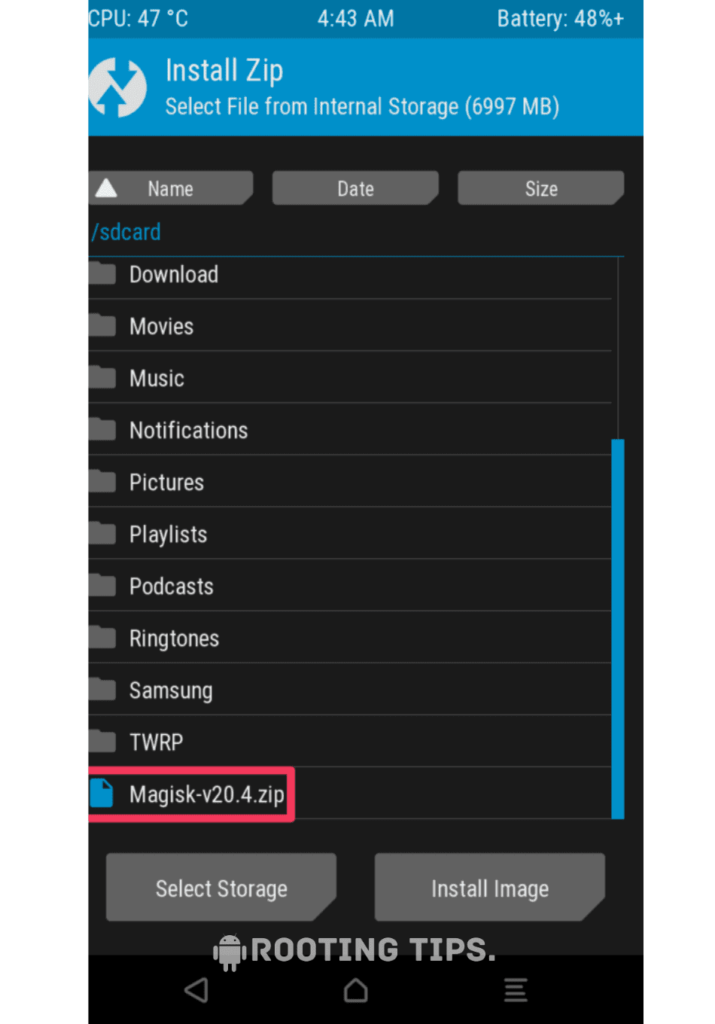
- Click on the “Install button” and locate the “Magisk file”.

- Select the “.Zip” file from the shown list to open the flashing menu.
- “Swipe right” to start the flashing process.
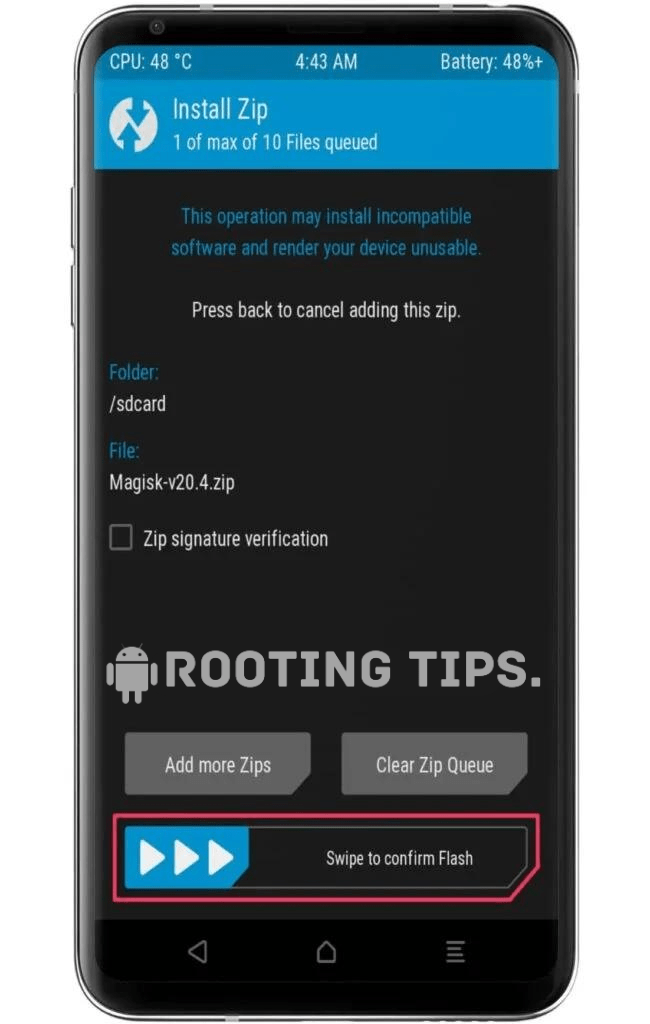
- Reboot the device when the flashing process is complete.
And BOOM, now your device is successfully rooted. So now you can enjoy the rooting and customization features.
Method #2: Using Fastboot and ADB
- Go to Settings >> About Phone >> Tap on “Build Number” several times until “Developer Mode” is enabled.
- Access the “Developer option” to Enable “USB debugging” and “OEM Unlocking”.
- Connect your smartphone to the PC or laptop using the “USB Cable”.
- Open the platform tool folder and type “cmd” in the folder’s search bar.
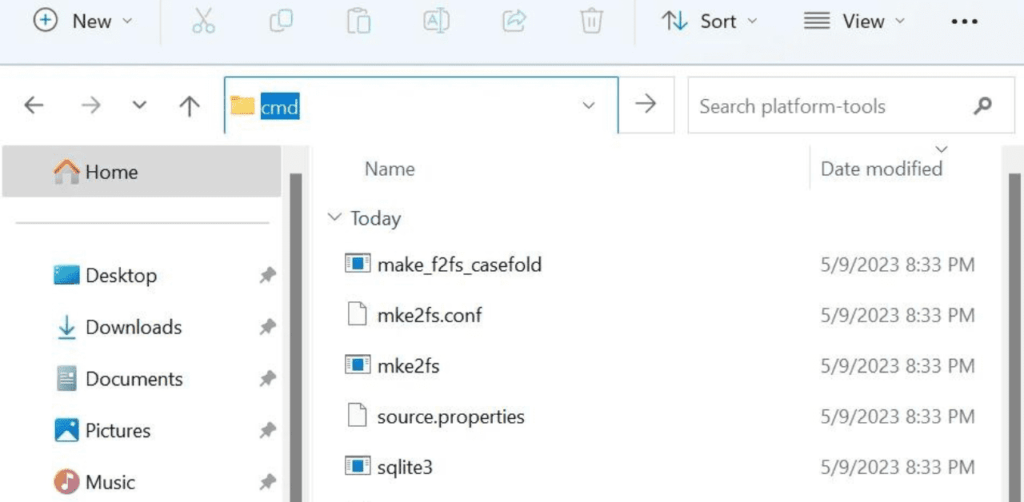
- A terminal window or command prompt will display on the screen.
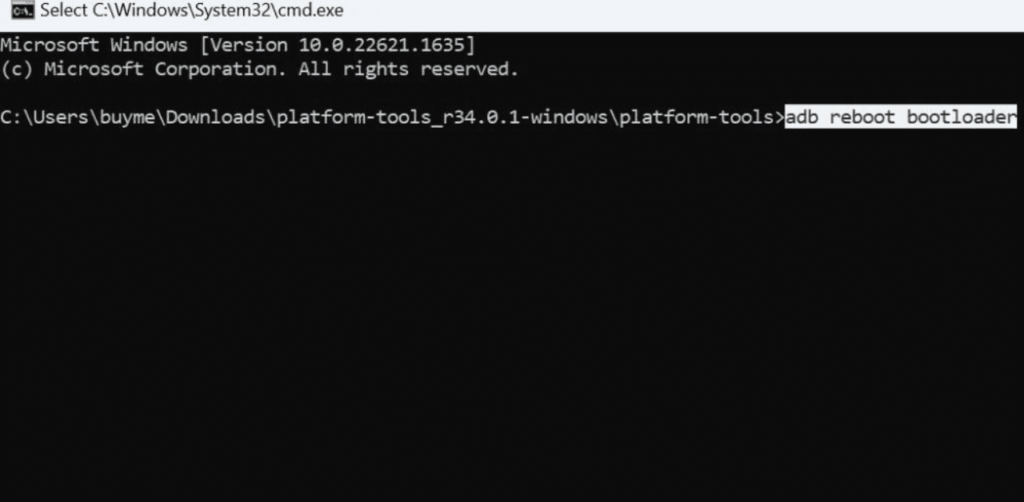
- Now type the first command, “adb reboot bootloader”, to boot into the bootloader.
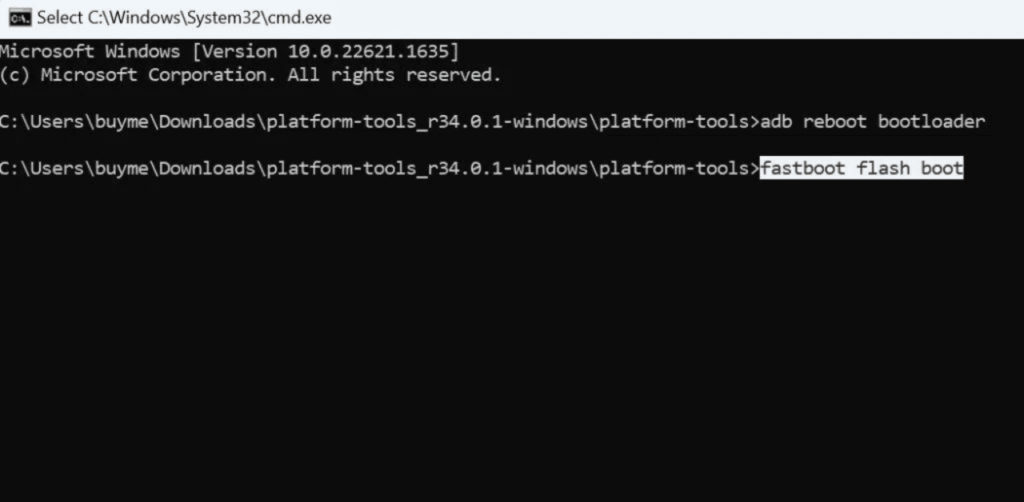
- Finally, type the command “fastboot reboot” to reboot the device.
You have now successfully rooted your Infinix GT 10 Pro.
Method #3: Root Infinix GT 10 Pro Without PC
- Download and install the KingoRoot app on your Infinix GT 10 Pro.
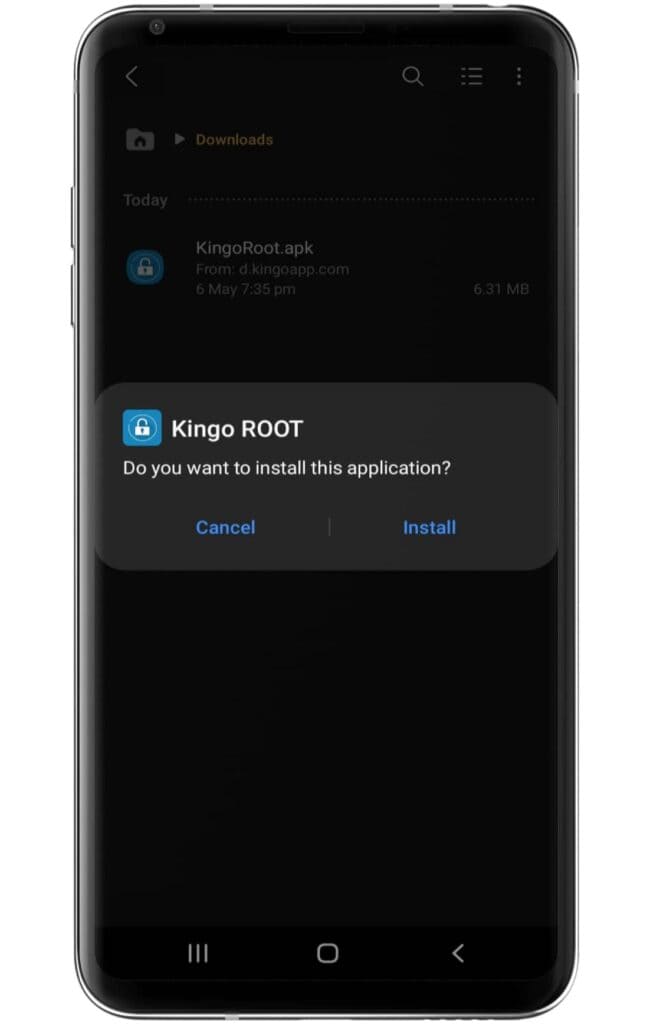
- Make sure to enable the “unknown source” settings on your device.
- Now, open the application and click on the One Click Root option.
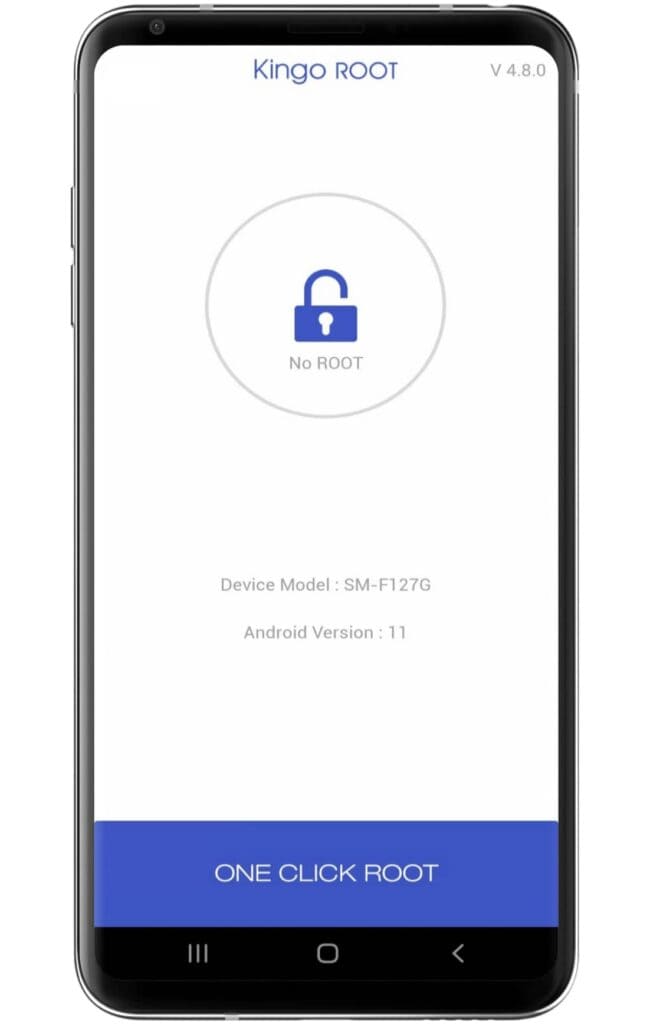
- Wait until the Rooting process ends on the Kingoroot app.
- After completing the process, your Infinix GT 10 Pro has been successfully rooted.
How do I uninstall Magisk on Infinix GT 10 Pro?
If you are not using rooting or you are not having fun, then you can unroot your device again. Your phone will be back to normal without any hassle. There are some simple ways to unroot your device, which I will tell you below.
- Open the Magisk App on your device.
- Go to the “Settings” menu Tap (three horizontal lines) in the upper-left corner, and then select “Settings”.
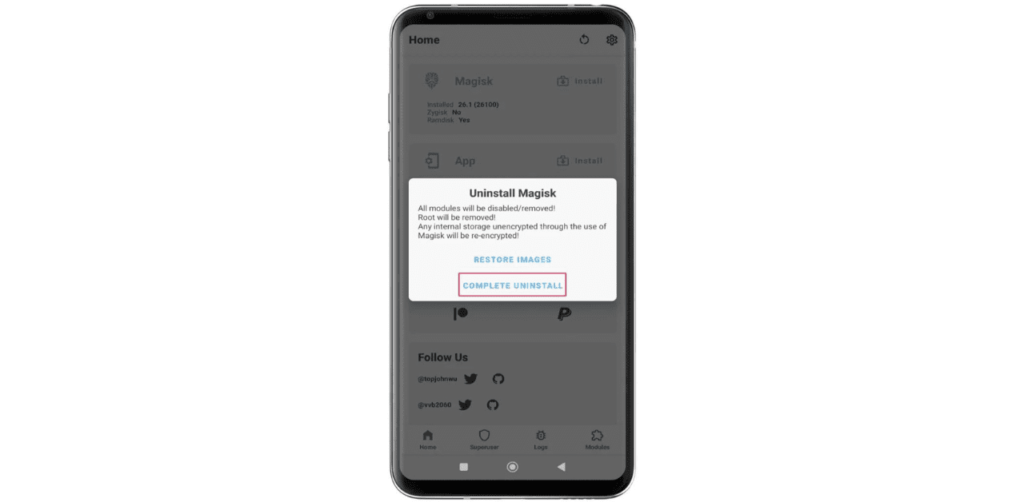
- Scroll down in the Settings menu and tap the “Uninstall” button.
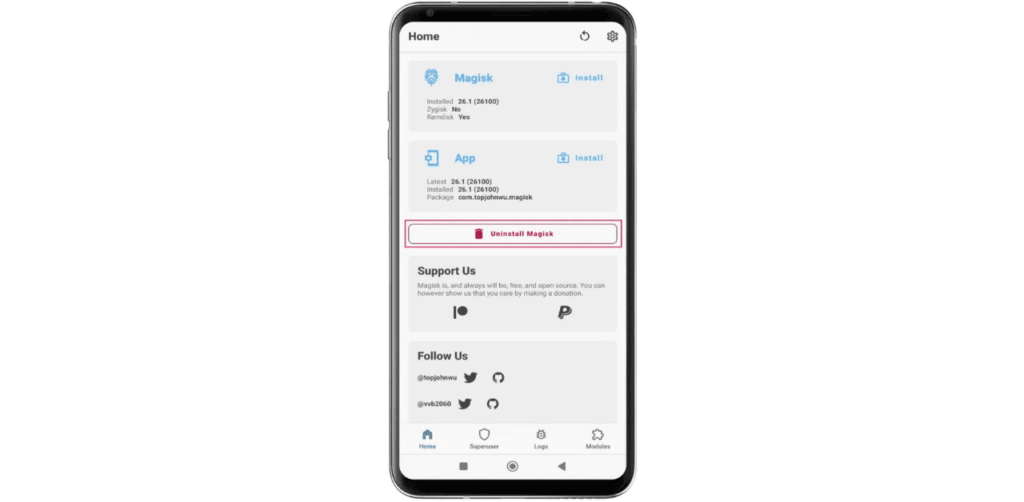
- Follow the prompts to “Uninstall Magisk” and Restore your device to its original, unrooted state.
Now your Infinix GT 10 Pro 5G is successfully rooted.
Frequently Asked Questions (FAQs)
Ans. A rooted phone gains significant power by allowing users to access and modify system files, enabling advanced customization, and installing powerful apps. However, this also exposes the device to potential security risks and voids the warranty. Use with caution and only if you understand the implications.
Ans. Yes, you can unroot your phone after rooting it. By using appropriate methods, such as flashing the official firmware or using unrooting apps, you can reverse the rooting process and restore your device to its original state.
Ans. Rooting may void device warranties and violate the terms of service, but it is not explicitly illegal in India. Users should be aware of the potential consequences and legality of specific activities after rooting their devices.
Conclusion
Finally, we made it to the end. I hope you guys have easily rooted your device by following my steps and are enjoying rooting your device. If you face any problems understanding, feel free to contact us and let us know in the comment box. We will try to give you a suitable solution for your problem, thanks.