Hello friends! If you want to root your Motorola G22, then today in this article we will teach you how to root your Motorola G22. Rooting gives you complete control over your device and offers many customization features, such as UI modification themes. The modification possibilities are endless Today’s guide will be very straightforward. You just have to follow the steps carefully.
What is root?
By gaining superuser or administrative access to the operating system of an Android device, users can change system files, delete factory-installed apps, and make other alterations that go beyond what is generally permitted by the device’s maker. Think of it as obtaining “root” access to the system’s core, similar to becoming a computer administrator.
However, while rooting can offer greater control and customization options, it also comes with risks. Altering critical system files could potentially lead to instability, security vulnerabilities, and the voiding of warranties. It’s like unlocking a door to a world of possibilities, but stepping in cautiously is key to avoiding pitfalls and making the most of the experience.
Advantages or Benefits of rooting
- Custom ROMs and Mods: Rooting allows you to use custom ROMs like third-party-based operating systems on your device. This gives you access to new features, themes, and personalization opportunities.
- Backup & Restore: Rooting allows you to back up and restore all of your device’s data with ease, thereby increasing the security of your data.
- Get Complete Control: When you root your device, you get complete control. You can install and remove applications, make system-level changes, and delve deeper into the device’s settings.
- Ad Blocking & Performance Boost: Rooting allows you to block ads displayed by applications using ad-blocking apps. Additionally, you can make changes to the system settings to enhance the performance of the device.
- Removal of applications: Rooting allows you to completely remove applications that were already installed and that you do not need. This frees up your device’s storage and improves system performance.
Disadvantages or Cons of Rooting
- Battery and performance issues: After rooting, some applications may consume more battery and performance, which may affect your device’s battery life and performance.
- Data Loss: If something goes wrong during rooting, all the data on the device may be lost.
- Possibility of exception: When attempting to root, there is a possibility of a device fault that may cause the device to be bricked, i.e., non-working.
- Permissions and Security Risk: By rooting, applications can access deeper parts of your system and access your personal information without permission, which can lead to increased security risk.
- Requires more time and knowledge: Rooting requires more time and technical knowledge from you, which can be difficult for novice users.
Pre Requirements:
- Correct USB Drivers and Cable: Install the valid USB drivers for your device on your PC and choose an original USB cable. This will help you connect your phone to the PC properly.
- Battery charge: Make sure your device’s battery health is above 80% at the time of rooting. So that your device’s battery does not get drained while rooting.
- Data Backup: Before rooting, you must keep your device’s important data in a safe place. Because rooting can corrupt your device’s data.
- Internet access: In the rooting process, you will need internet access. You will need to download the unlock tool and other stuff.
- Device version check: Before starting the rooting process, you have to check your device’s model number and version. It’s important to download the correct rooting method and files for your device.
Let’s Root Motorola G22
In this step, we will use two simple and safe methods to root your Motorola G22. The first method uses TWRP Custom Recovery, the second method uses Fastboot and ADB, and the third method is Root Without PC. Out of these three, you can use whichever method you like, but before rooting, please complete the previous steps. necessary to do
Warning:- Rooting may void your device’s warranty and cause some security issues. RootingTips will not take any responsibility for any issue.
Method #1: Using the TWRP Custom Recovery
Step 1: Unlock the bootloader
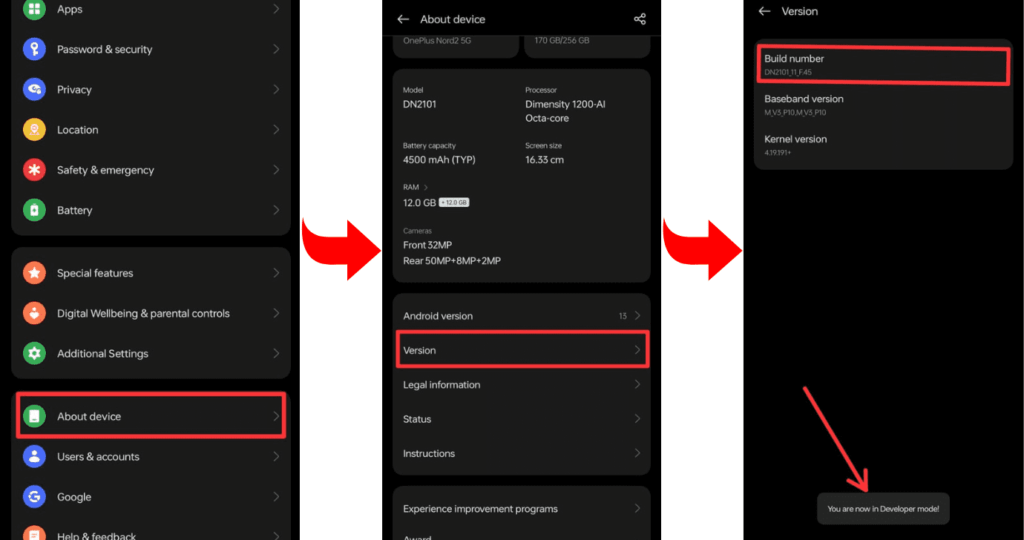
- Enable Developer Options: Go to device Settings, scroll down, and tap on >> “About phone” >> then tap on >> “Build number”, several times until >> “Developer Options” is activated.
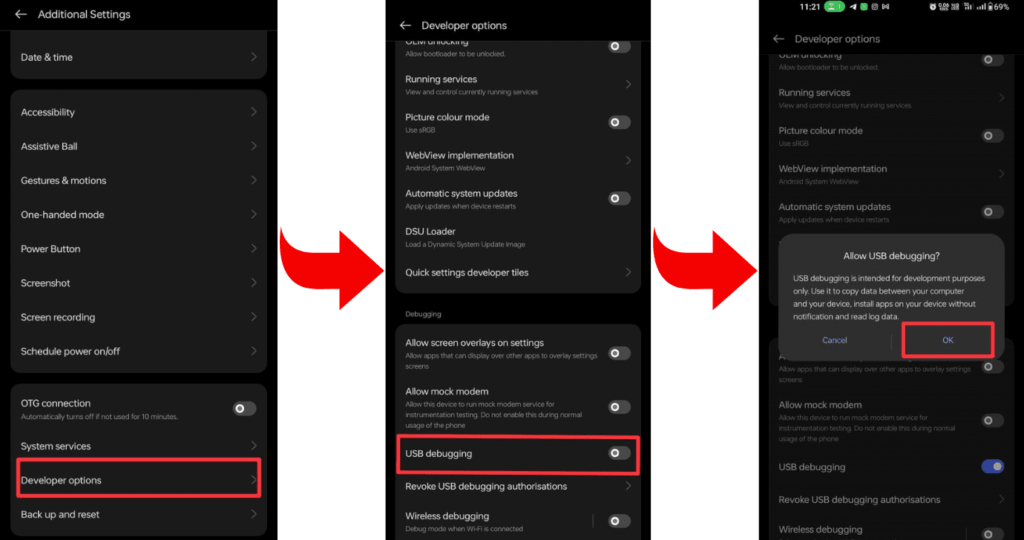
- Go to Settings and select “Developers Mode.” Now find the options “OEM Unlocking” and “USB Debugging” and enable them.
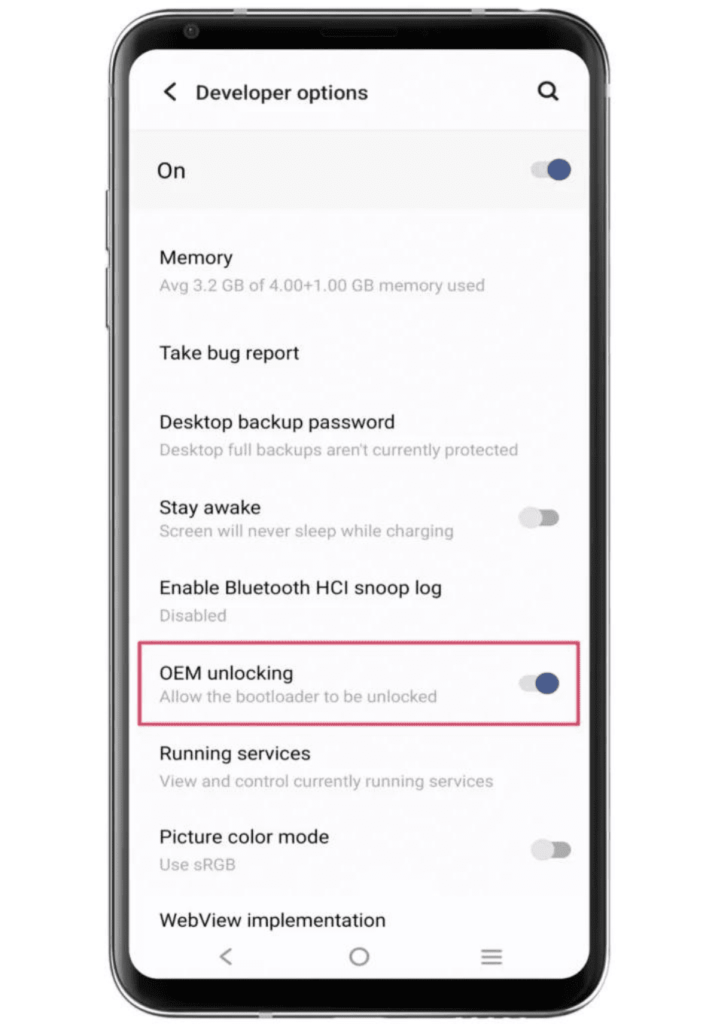
- Now boot your Motorola G22 into bootloader mode to Unlock the Bootloader.
- Connect the phone to the PC or laptop using a USB cable.
- Type the command “fastboot oem unlock” in the terminal.
Step 2: Install and flash TWRP custom recovery
- Download the file: Go to the TWRP official website and download the TWRP recovery file for your Motorola G22, according to the model “G22” and brand “Motorola” of your device. The file can be a string or in “img” format.
- Boot your phone into bootloader mode: To enter bootloader mode, you can press and hold the “Power button” and “Volume Down” buttons of your phone simultaneously. After that, you have to select “Bootloader” or “Fastboot” by using the “Volume Up/Down button”.
- Flashing TWRP Recovery: After getting your phone into Fastboot mode, use a USB cable and connect it to your PC.
- Flash the recovery: Now, open the flashing tool on your PC and select the TWRP recovery file on your phone. Select the appropriate option to flash the file, and wait for the process to complete.
If you need a TWRP installation guide you can check out our related posts.
Step 3: Get the correct Magisk Zip
We are assuming that you have completed the TWRP flashing process on your Motorola G22 with our method. Which we told you very well in the previous step. If you haven’t done it, then do it now. Then you are ready to flash the Magisk Zip file. So now you can download the Magisk zip file, which is given below.
Step 4: Root using Magisk Zip
- Let’s start by booting TWRP Custom Recovery.
- Press the “Install button” and find the “Magisk file”.
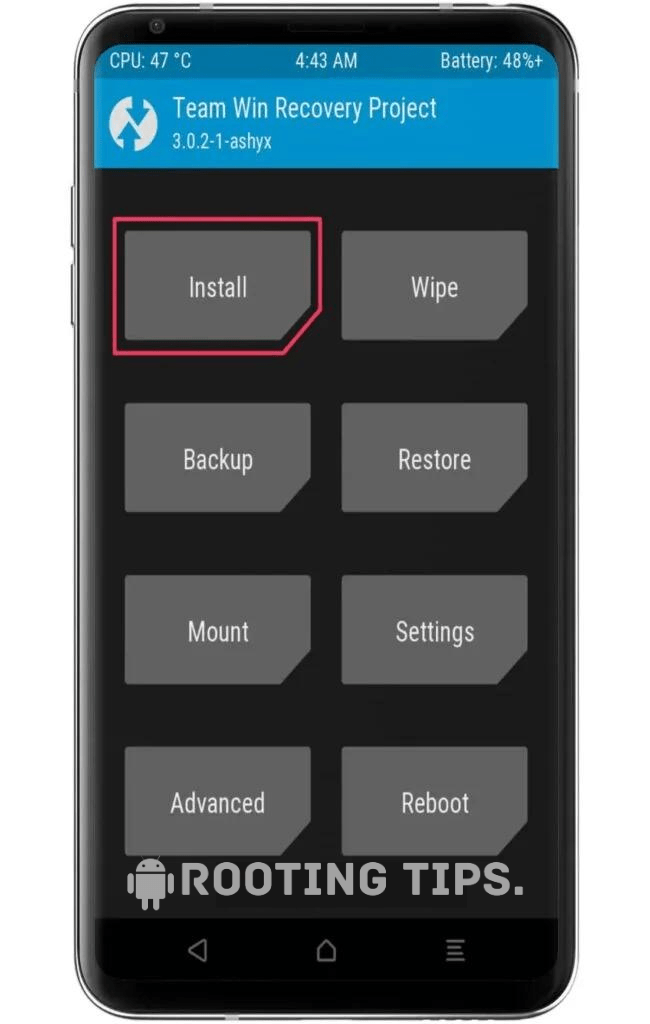
- Select the “.Zip” file from the shown list to open the flashing menu.
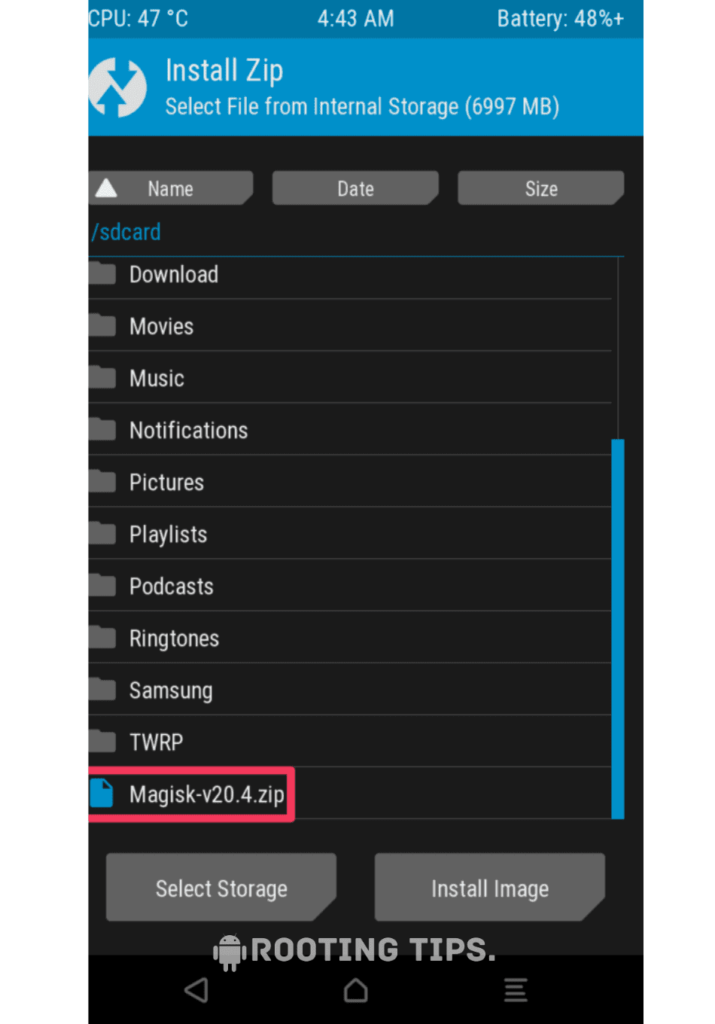
- “Swipe right” to start the flashing process.
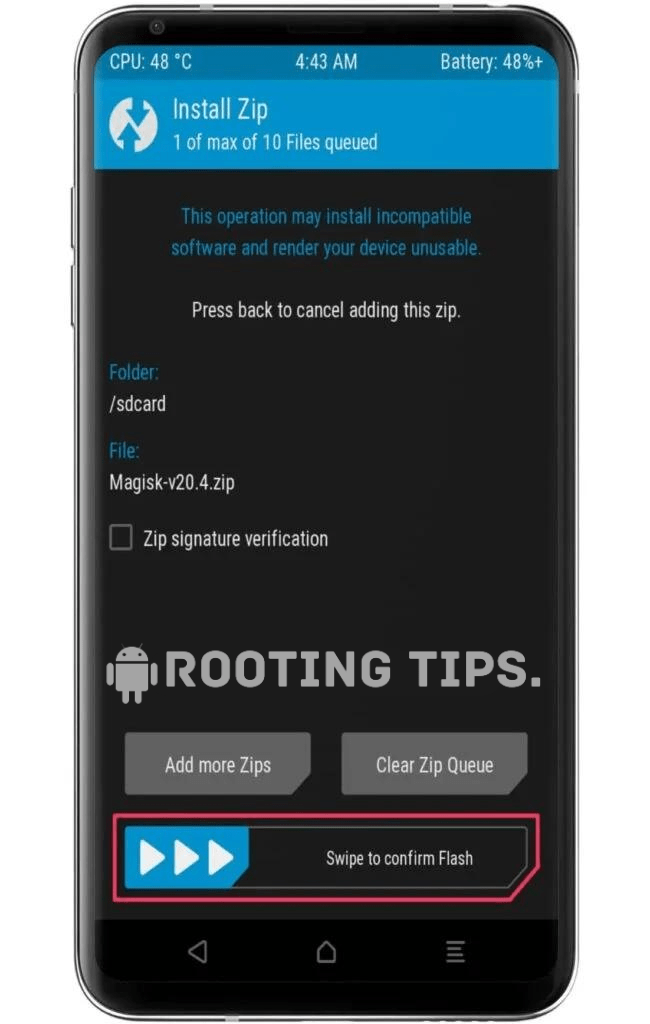
- Reboot your device when the flashing process is complete.
Congratulation! You have successfully rooted your Motorola G22. Now you can optimize and customize your device freely.
Method #2: Using Fastboot and ADB
Download platform tools and ADB drivers on your PC or laptop.
- Go to Settings >> About Phone >> Tap on “Build Number” several times until “Developer Mode” is enabled.
- Access the “Developer option” to enable “USB debugging” and “OEM Unlocking”.

- Connect your smartphone to the PC or laptop using the “USB Cable”.
- Open the platform tool folder and type “cmd” in the folder’s search bar.
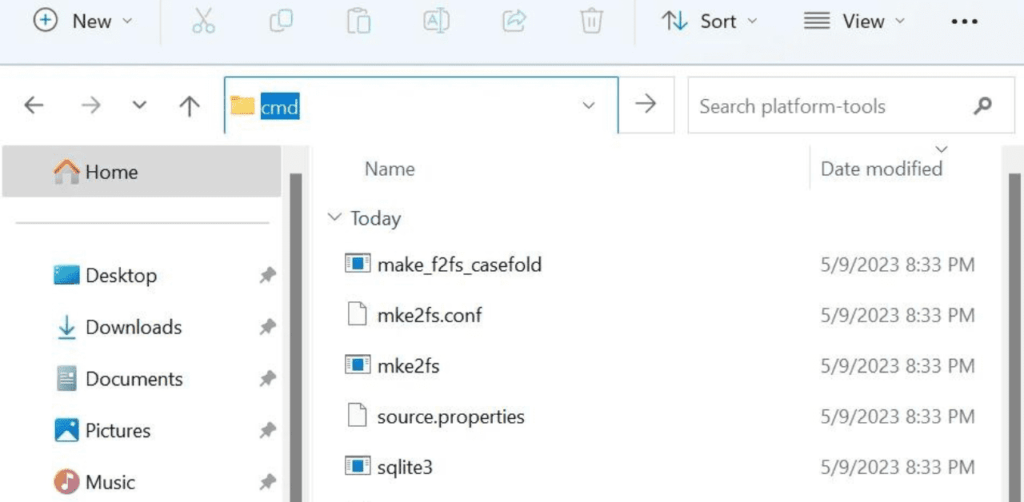
- A terminal window or command prompt will display on the screen.
- Now type the first command, “adb reboot bootloader”. to boot into the bootloader.
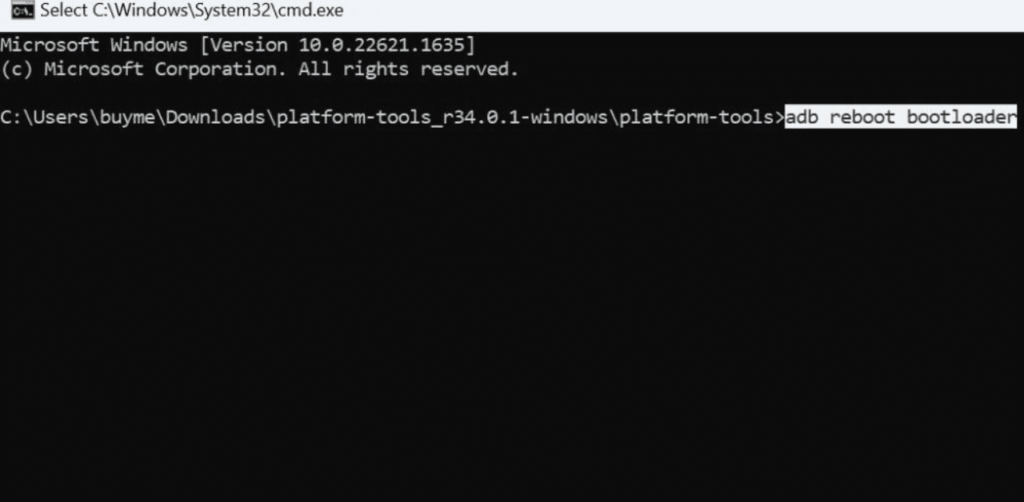
- Now, enter the command “fastboot flash boot” and choose Magisk_file.zip. then hit Enter to start the flashing process on your device.
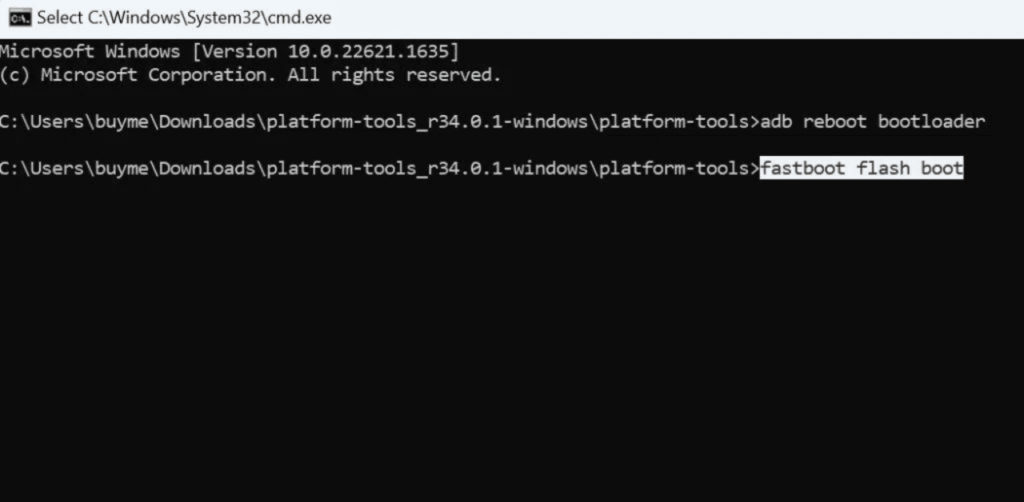
- Finally, type the command “fastboot reboot” to reboot your Motorola G22.
Method #3: Root Motorola G22 Without PC
- Download and install the KingoRoot app on your Motorola G22.
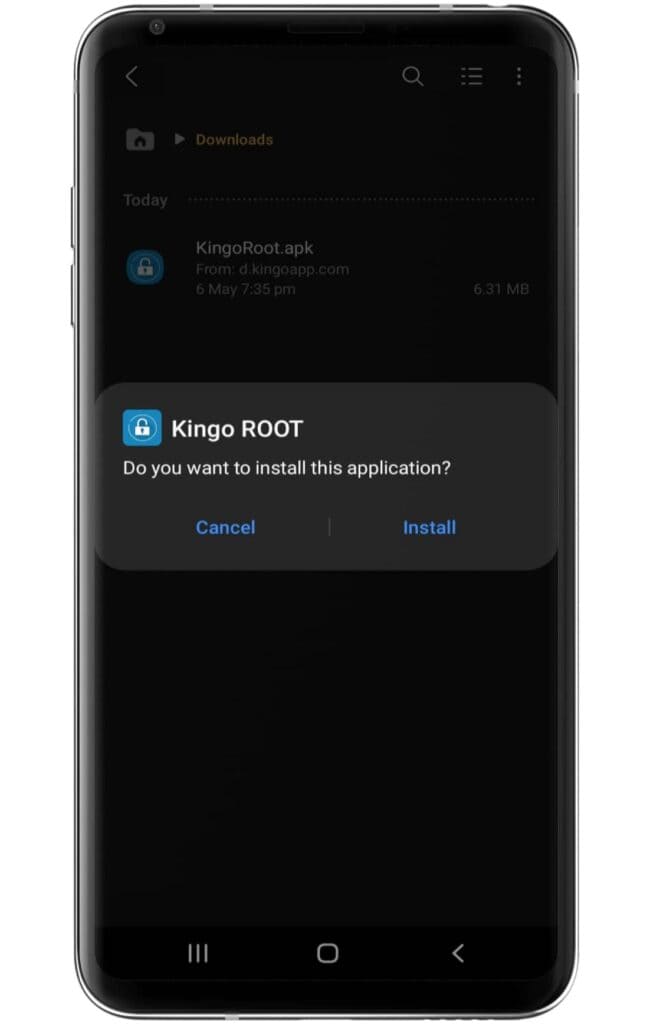
- Make sure to enable the “unknown source” settings on your device.
- Now, open the application and click on the One-Click Root option.
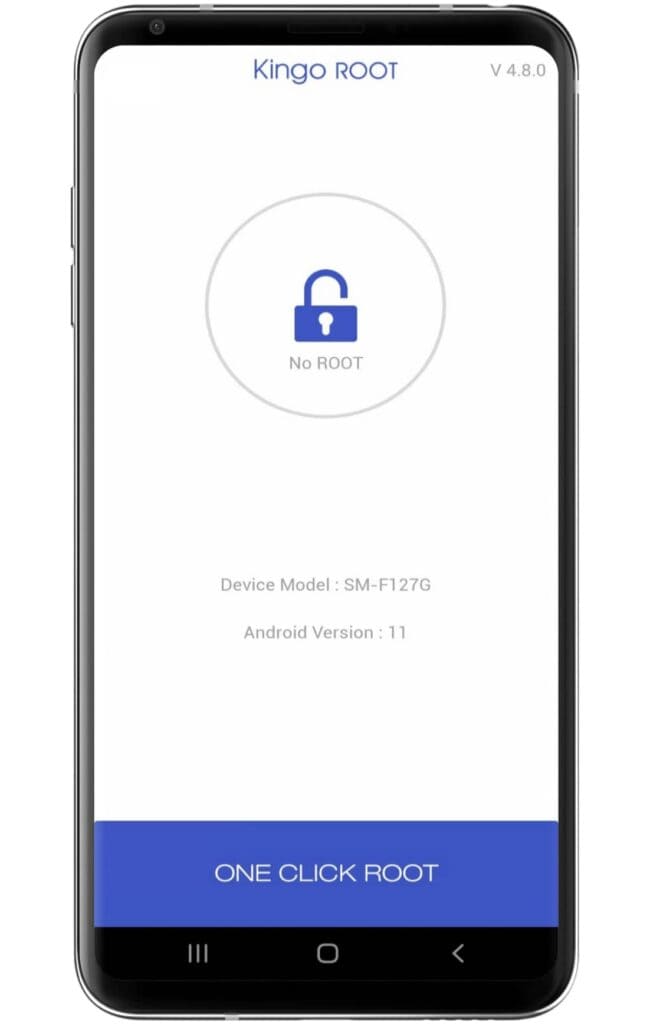
- Wait until the rooting process ends on the Kingoroot app.
- After completing the process, your Motorola G22 has been successfully rooted.
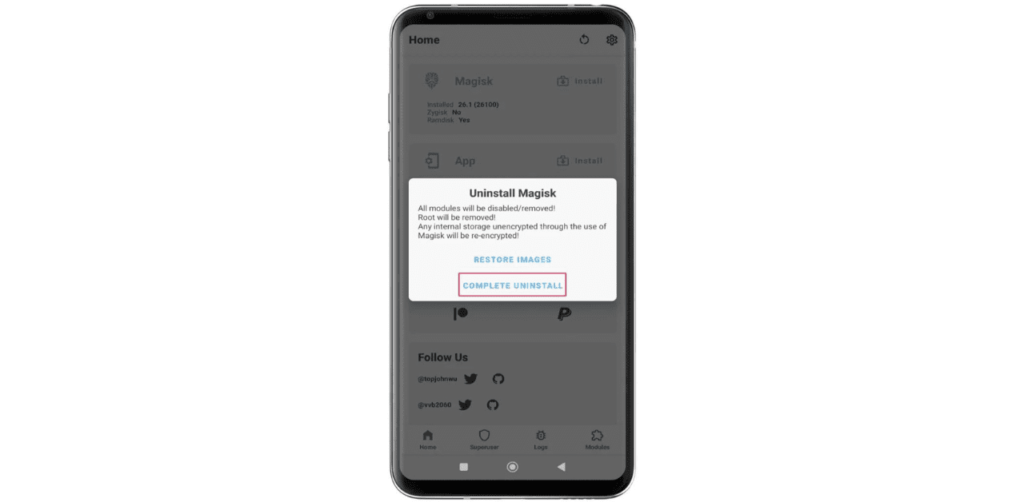
How to uninstall Magisk on Motorola G22?
If you are thinking of unrooting your Motorola G22, then here are some common steps for doing so.
- Open the Magisk App on your device.
- Go to the “Settings” menu Tap (three horizontal lines) in the upper-left corner, and then select “Settings”.
- Scroll down in the Settings menu and tap the “Uninstall” button.
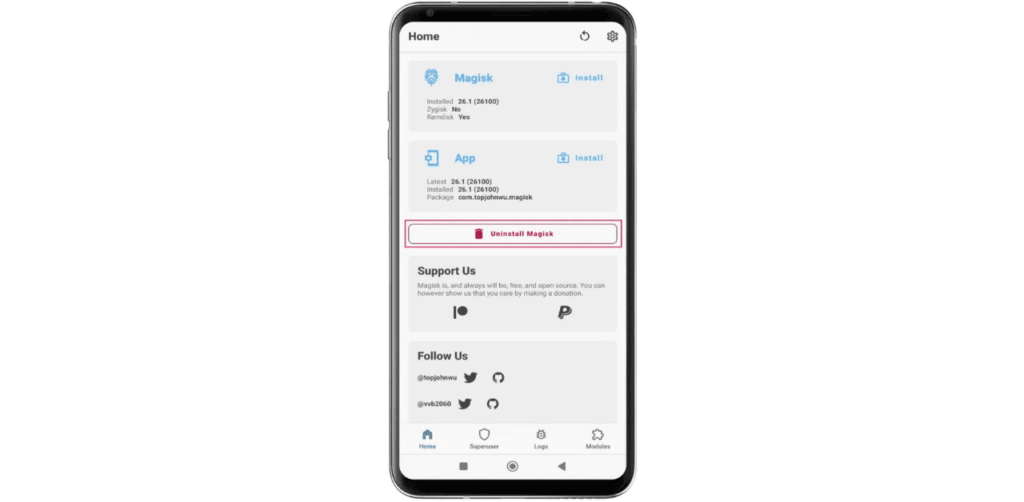
- Follow the prompts to “Uninstall Magisk” and Restore your device to its original, unrooted state.
Frequently Asked Questions (FAQs)
Ans. Rooting, or jailbreaking, smartphones is not explicitly illegal in India, but it can void warranties and potentially violate software terms. Users should be aware of potential legal and security implications before proceeding.
Ans. No, rooting doesn’t increase RAM. Rooting provides administrative access to a device, but RAM is a physical hardware component and cannot be expanded through rooting.
Ans. Yes, rooting without a PC is possible. Many Android apps offer one-click rooting methods directly on your device, streamlining the process. Just ensure you follow instructions carefully and are aware of the potential risks.
Conclusion
Hey guys, We made it to the very end. Rooting gives you complete control of your Motorola G22. Rooting has some major advantages, and I hope you guys have easily rooted your device by following my steps. If you have any problems understanding, feel free to contact us. Let us know in the comment box, and we will try to give you a suitable solution for your problem. Thank you for reading this article.