Hello friends! If you want to root your Motorola Razr 40 Ultra, then you have come to the right place. In this article, we will tell you how to root Motorola Razr 40 Ultra. So you stay with us, and you can root very easily by following our steps. By rooting, you can run many apps on your phone that you could not run earlier. And you can customize or optimize your smartphone. To root the phone, stay in this article till the end.
What is a root?
Rooting an Android device is like opening up a secret door within your phone’s operating system. It’s akin to becoming the ultimate administrator, allowing you to access and modify areas that are typically off-limits. Think of it as wielding a digital wizard’s staff; with great power comes great responsibility. While it can unlock the potential for customized themes, exclusive apps, and deep-level optimizations, one must tread carefully in this enchanted forest of possibilities.
Just as a mispronounced spell can lead to unintended consequences, improper rooting can result in a bricked phone or security vulnerabilities. So, in the realm of Android, to ‘root’ is to venture into the heart of your device’s magic, but remember, not all who wander are rooted equally.
Advantages or Benefits of rooting
- Removal of Unwanted Apps: Rooting allows you to completely remove unwanted apps from your device, which can negatively affect your device’s performance.
- Custom ROM Installation: After rooting, you can install custom ROMs on your device, which come with new features and updates.
- Improvement of Battery Life: Rooted devices may provide the facility to improve battery life.
- Complete Customization Freedom: When you root your device, you get complete customization freedom. You can customize your operating system, interface, apps, and system settings to your liking.
- Backup and Restore feature: On a rooted device, you can get a backup and restore feature, so you can enhance data security.
Disadvantages or Cons of Rooting
- Risk of losing warranty: A warranty is provided by most device manufacturers only on the original software. When you root your device, you take the risk of changing this software, and this may void your warranty.
- Performance Issues: After rooting, device performance may be affected if you modify the wrong applications or system settings. This can make the device slow or cause hanging issues.
- Virus and Malware Vulnerability: If you download applications or software from unauthorized sources, your device may become a victim of viruses and malware.
- Problems with Updates: Due to root, there may be problems with getting the original updates. These problems can occur if new system updates don’t work correctly on rooted devices.
- Your device may be bricked: If you complete the rooting process incorrectly, your device may be bricked, which means it won’t work.
Pre Requirements:
- Data Backup: Rooting can corrupt your device’s data very easily, so before rooting, put your device’s data in a safe place.
- Battery charge: while root your device’s battery may get drain completely, so make sure the battery has more than 80% charge.
- Device version check: You need to check the model number and version of your device to know the correct rooting method and download some files for your device.
- Internet access: while root you need to download some unlock tools and files, For which you will need internet access.
- Correct USB Drivers and Cable: Install the correct USB drivers for your device on your PC And choose an original USB Cable. This will help you connect your phone to the PC properly.
Let’s Root Motorola Razr 40 Ultra ~ 3 [Working Methods]
In this article, we have discussed three methods to root your Infinix GT 10 Pro:
Method #1: Using TWRP Custom Recovery Method #2: Using Fastboot and ADB Method #3: Root Your Device Without PC Let’s root your Redmi 12 5G without any further ado, but if the pre-requisites First first completed, then you can root your smartphone at your own responsibility.
Warning:- Rooting may damage your device, void your device’s warranty, and expose your device to certain security risks for which RootingTips will not take any responsibility. so please root your device at your own risk.
Method #1: Using the TWRP Custom recovery
I trust you have complied with the prerequisites. Let’s begin with step 1 and carefully complete the next steps. Start rooting now.
Step 1: Unlock the bootloader
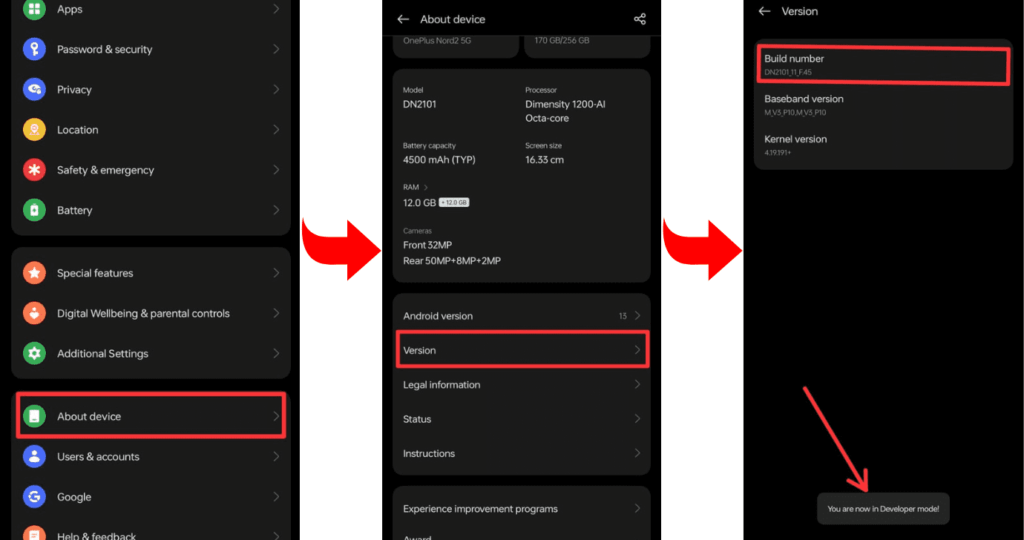
- Enable Developer Options: Go to device Settings, scroll down, and tap on >> “About phone” >> then tap on >> “Build number”, several times until >> “Developer Options” is activated.
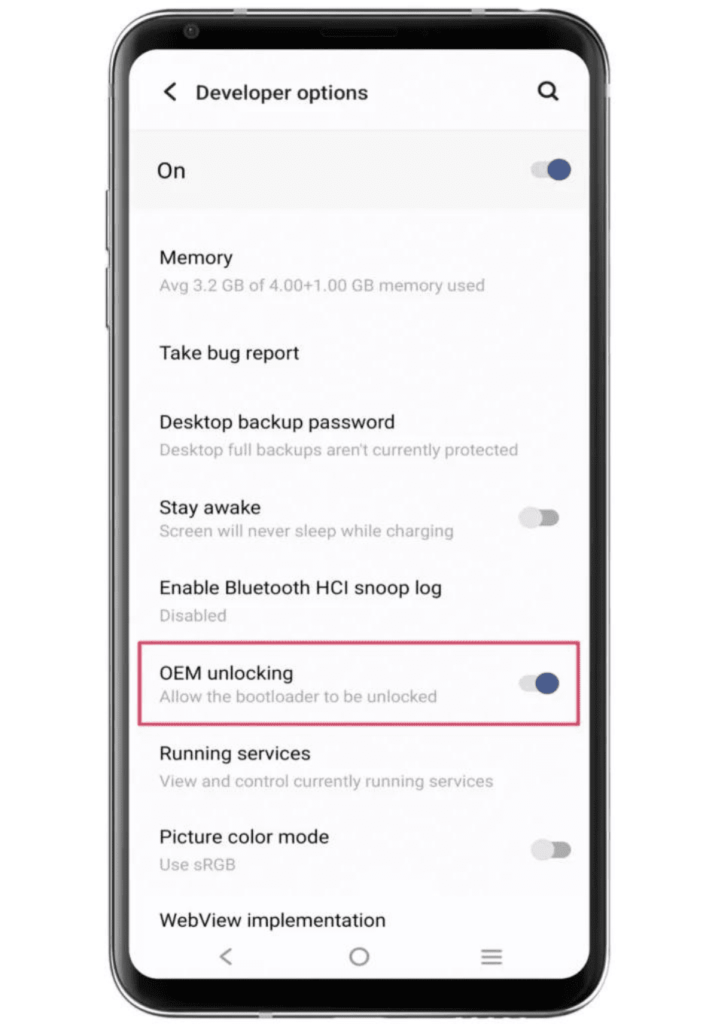
- Go to Settings and select >> “Developers mode” Now find the option >> “OEM Unlocking” and >> “USB Debugging” and enable it.

- Now boot your Motorola Razr 40 Ultra into bootloader mode to Unlock the Bootloader.
- Connect the phone to the PC or Laptop using a USB cable.
- Type the command “fastboot oem unlock” in the terminal.
After that, the bootloader will now be unlocked on your Motorola Razr 40 Ultra.
Step 2: Install and flash TWRP custom recovery
- Download the file: Go to the TWRP official website and download the TWRP recovery file for your Motorola Razr 40 Ultra, according to the model “Razr 40 Ultra” and brand “Motorola” of your device. The file can be a string or in “img” format.
- Boot your phone into bootloader mode: To enter Bootloader Mode, you can press and hold the “Power button” and “Volume Down” buttons of your phone simultaneously. After that, you have to select “Bootloader” or “Fastboot” by using the “Volume Up/Down button”.
- Flashing TWRP Recovery: After getting your phone into Fastboot mode, use a USB cable and connect it to your PC.
- Flash the recovery: Now, open the flashing tool on your PC and select the TWRP recovery file of your phone. Select the appropriate option to flash the file and wait for the process to complete.
Flashing the recovery will be successful. After rebooting your device and entering TWRP recovery, the system and settings on your phone can be backed up and restored in text mode.
If you need a TWRP installation guide you can check out our related posts.
Step 3: Get the correct Magisk Zip
If you have finished installing the TWRP recovery on your smartphone, you are ready to flash Magisk files. In this part, you’ll get the most recent version, which gives you systemless root access right away.
Click the download option to access the Magisk Zip file, then carefully read the instructions to finish rooting process on your Motorola Razr 40 Ultra.
Step 4: Root using Magisk Zip
I hope the Magisk zip file archive you downloaded from the prior part arrived. The Magisk flashing process will now start. The following are the general instructions in the user manual:
- Let’s start by booting TWRP custom recovery.
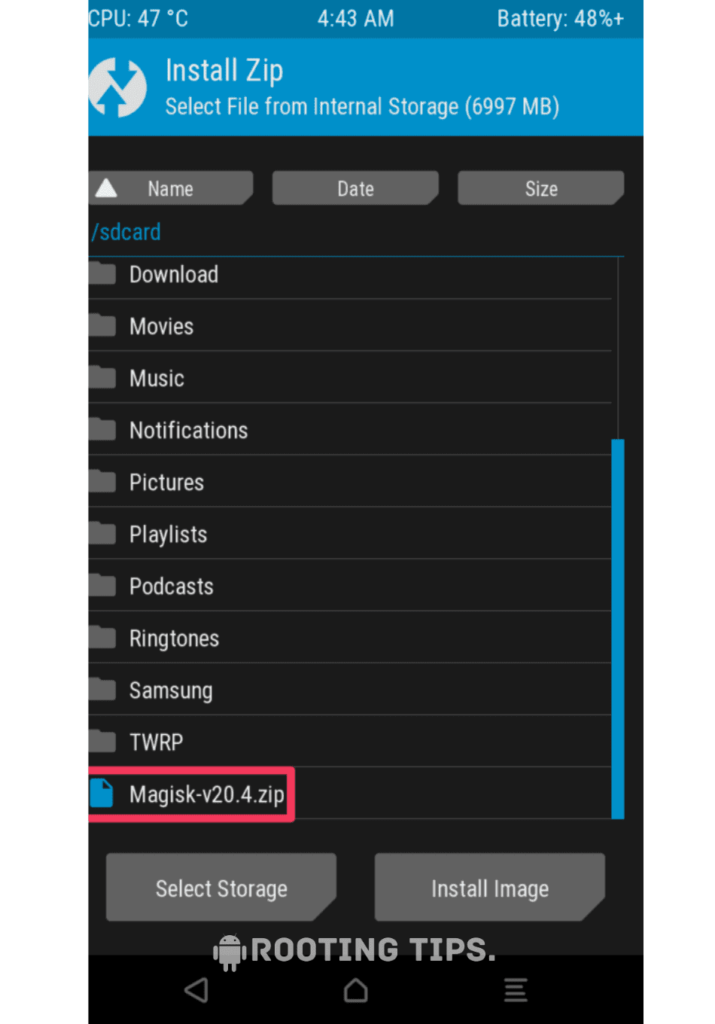
- Press on the “Install button” and find the “Magisk file”.

- Select the “.Zip” file from the shown list to open the flashing menu.
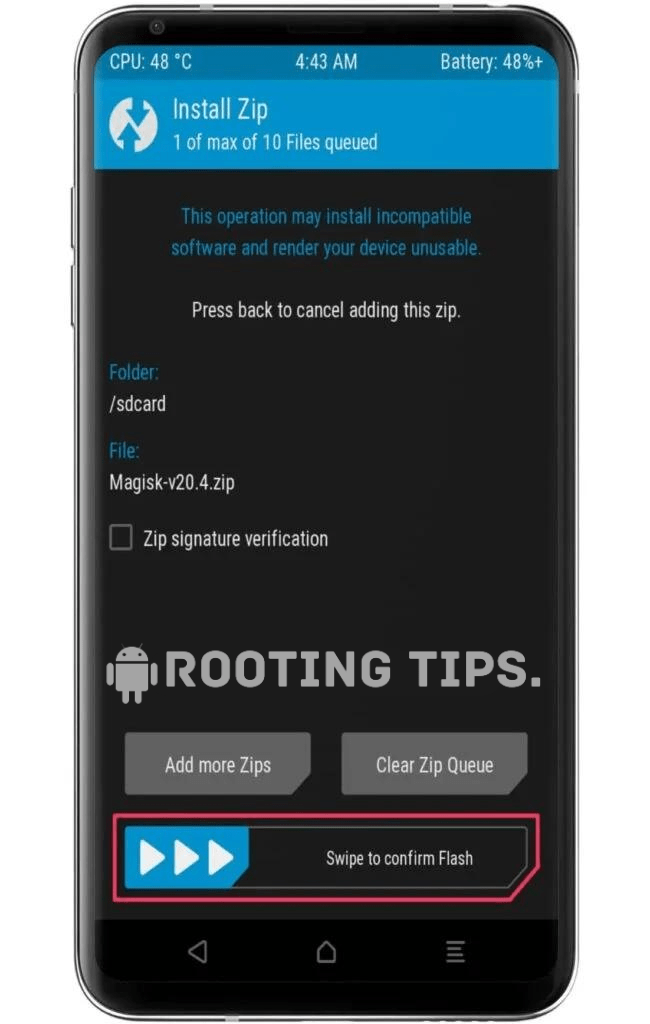
- “Swipe right” to start the flashing process.
- Reboot your device when the flashing process is complete.
Your Motorola Razr 40 Ultra has now been successfully rooted. Take advantage of your device’s rooting and customization options.
Method #2: Using Fastboot and ADB
Here is a second approach to root your Motorola Razr 40 Ultra in case the first method didn’t work for your device.
- Go to Settings >> About Phone >> Tap on “Build Number” several times until “Developer Mode” is enabled.
- Access the “Developer option” to Enable “USB debugging” and “OEM Unlocking”.
- Connect your Smartphone to the PC or laptop using the “USB Cable”.
- Open the platform tool folder and type “cmd” in the folder’s search bar.
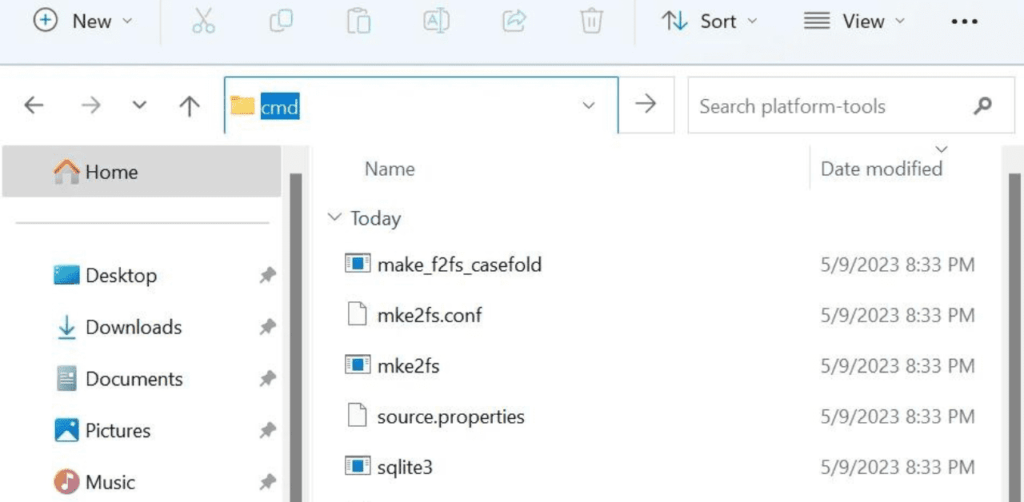
- A terminal window or command prompt will display on the screen.
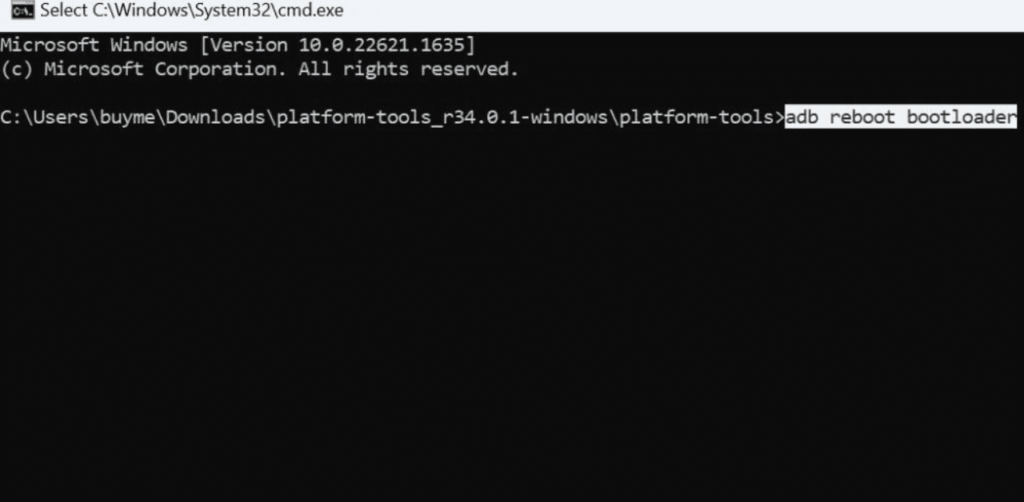
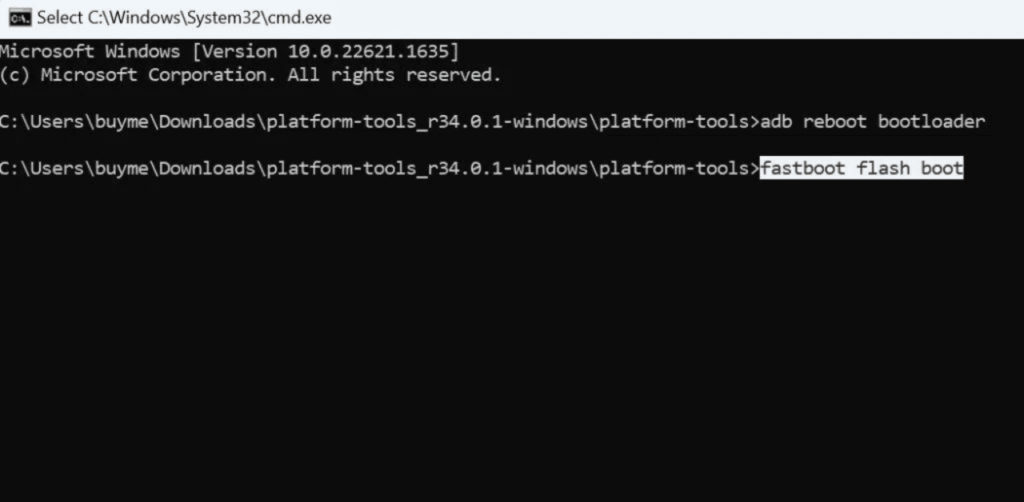
- Now type the first command, “adb reboot bootloader” to boot into the bootloader.
- Finally, type the command “fastboot reboot” to reboot the device.
Now your Motorola Razr 40 Ultra is successfully rooted. Enjoy the rooting features on your device.
Method #3: Root Motorola Razr 40 Ultra Without PC
- Download and install the KingoRoot app on your Motorola Razr 40 Ultra.
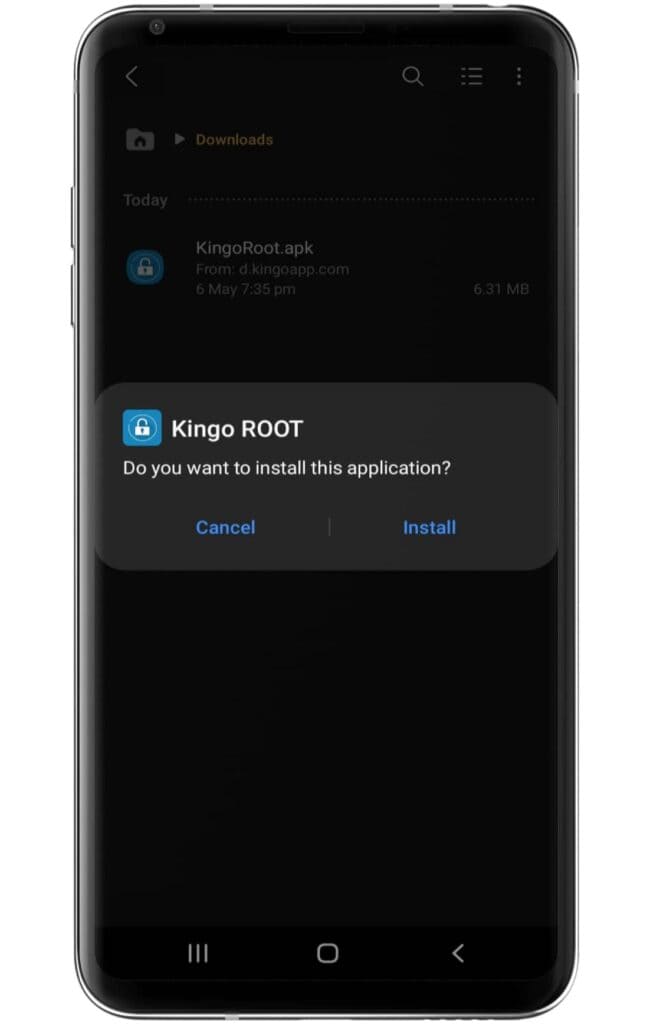
- Make sure to enable the “unknown source” settings on your device.
- Now, open the application and click on the One Click Root option.
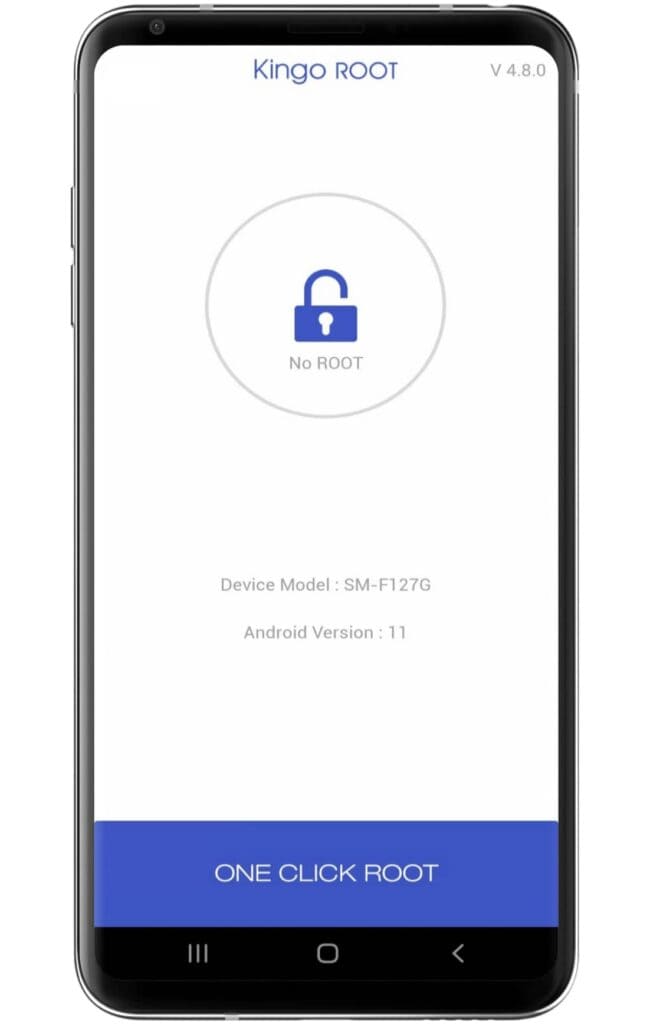
- Wait until the Rooting process ends on the Kingoroot app.
- After completing the process, your Motorola Razr 40 Ultra has been successfully rooted.
How to uninstall Magisk on Motorola Razr 40 Ultra?
If you decide you no longer want to use root access or don’t like it, you can unroot your Motorola Razr 40 Ultra device will easily return to its initial state. Below are the procedures for unrooting your device.
- Open the Magisk App on your device.
- Go to the “Settings” menu Tap (three horizontal lines) in the upper-left corner, and then select “Settings”.
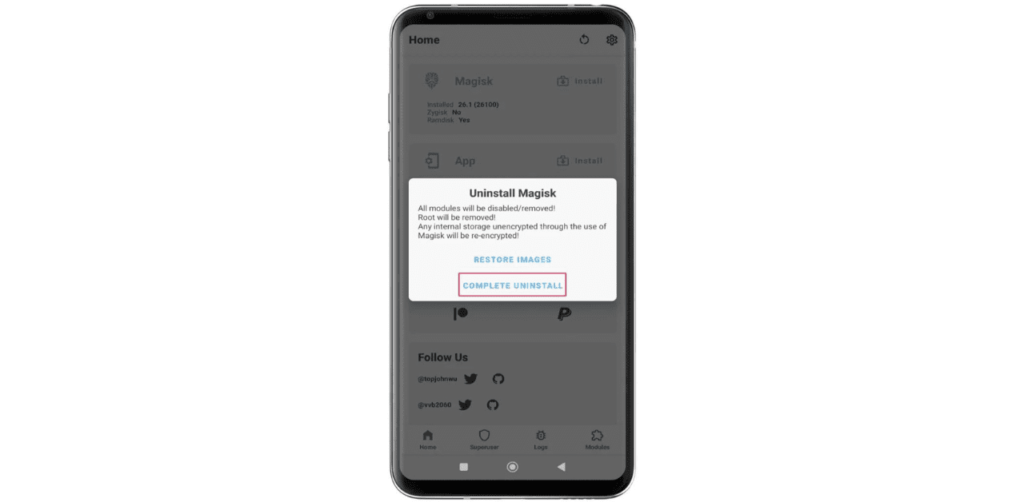
- Scroll down in the Settings menu and tap the “Uninstall” button.
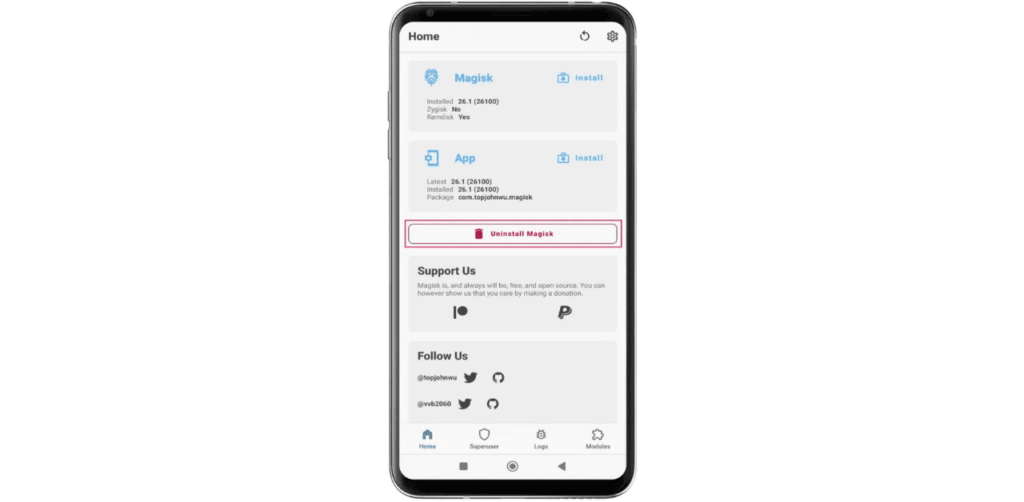
- Follow the prompts to “Uninstall Magisk” and Restore your device to its original, unrooted state.
Frequently Asked Questions (FAQs)
Ans. Yes, rooting a Motorola phone is possible, but it can void your warranty and may lead to security risks. Proceed with caution and research thoroughly before attempting.
Ans. Rooting an Android phone is generally legal, but it may void the warranty and pose security risks. Always check local laws and consider consequences before proceeding.
Ans. Yes, you can unroot your phone after rooting by using specific methods provided by your device manufacturer or using unrooting apps. This will restore your phone to its original state, but the process might void your warranty or cause potential issues.
Conclusion
So, friends, in this article, we have told you about the two easiest methods. If you are a beginner, then you can easily root your Motorola Razr 40 Ultra using either of these two methods. If you face any problems with rooting, then you can contact us. Can tell in the comment box. We will try to solve your problem, and we thank you for reading this article till the end.