Hello friends, If you want to use the full potential of your Redmi 12 5G smartphone, then you have come to the right place. In this article, we will tell you about rooting so that you can customize and optimize your device yourself. Even if you are a beginner or experienced, you can easily root your Redmi 12 5G with our described method. In this article, we will tell you about two simple methods of rooting. If you read it till the end, you will get more information about rooting and its advantages and disadvantages.
What is root?
Rooting an Android device refers to the process of gaining administrative privileges or ‘root access’ to the operating system. This allows users to access and modify system files and settings that are otherwise restricted by the manufacturer. Think of it as gaining superuser powers on your device, similar to having administrator rights on a computer.
Rooting can provide you with more control and customization options over your Android device. You can install apps that require root access, remove pre-installed bloatware, tweak system settings for performance and battery optimization, and even flash custom ROMs to completely change the look and functionality of your device.
Advantages or Benefits of rooting
- Superuser Access: When you root your device, you get superuser rights, which allow you to access the system level of your device and perform many common tasks with the help of the system.
- Custom ROM Installation: On a rooted device, you can install a custom ROM, so you can have a native operating system as well as other features and updates.
- Backup & Restore: Rooting allows you to back up your device’s entire data and restore it when needed, ensuring data security and recovery.
- Control of applications and processes: Rooting allows you to have greater control over the applications and processes running on your device, which can improve your device’s performance and battery life.
- Special Apps and Features: Rooting gives you the freedom to use special apps and features that may otherwise be unavailable on your device.
- Ad-Free Experience: Some applications allow the blocking of ads on rooted devices, so you can enjoy the experience without too many ads.
Disadvantages or Cons of Rooting
Some disadvantages of routing:
- Vulnerability to Viruses and Malware: When you root your device, your device’s security is reduced, and it can become a target for viruses and malware that can gain entry into your device.
- Void of Warranty and Guarantee: Rooting the device may void the existing warranty of your device, and you may face problems if you try to use authorized services.
- System Level Problems: If you root your device incorrectly, you may encounter system-level problems, such as slow device performance, aggressive battery consumption, or other system glitches.
- Disabling Updates: After rooting your device, you may be in a situation where you are not using official updates. This may result in a loss of security and the latest features of your device.
- Risk of Data Loss: If you do something wrong while rooting your device, your device is at risk of permanent data loss, which may result in losing your important data.
Please note that all these can be disadvantageous situations, but along with the advantages of rooting, these disadvantages also depend on the device of the user and their requirements.
Pre Requirements:
- Data Backup: Rooting has the potential to corrupt your device’s data, so keep your device’s data in a safe place.
- Battery charge: While rooting, your device’s battery may drain completely, so make sure that your device’s battery is more than 80%.
- Device version check: Before root, make sure to check your device’s model number and version, because you need to download the correct rooting method and other files for your device.
- Internet access: You will need internet access during root process to download unlock tools and some files.
- Correct USB Drivers and Cable: Install the correct USB drivers for your device on your PC And choose an original USB Cable. This will help you connect your phone to the PC properly.
Let’s Root Redmi 12 5G
We have told you three methods to root your phone. We have done a lot of research on these three methods and have shared with you all Method #1: Using the TWRP Custom Recovery Method #2: Use Fastboot and ADB. Method #3: Root your device without a PC. Let’s root your Redmi 12 5G without any delay, but before rooting, it is necessary to fulfill the pre-requisites.
Warning:- Root may void your device warranty and have some security risks. So root your device at your own risk.
Method #1: Using the TWRP Custom recovery
I hope you have fulfilled the prerequisites. Let’s start with step 1: follow all the steps carefully. Now start rooting.
Step 1: Unlock the bootloader
- Enable Developer Options: Go to device Settings, scroll down, and tap on >> “About phone” >> then tap on >> “Build number”, several times until >> “Developer Options” is activated.
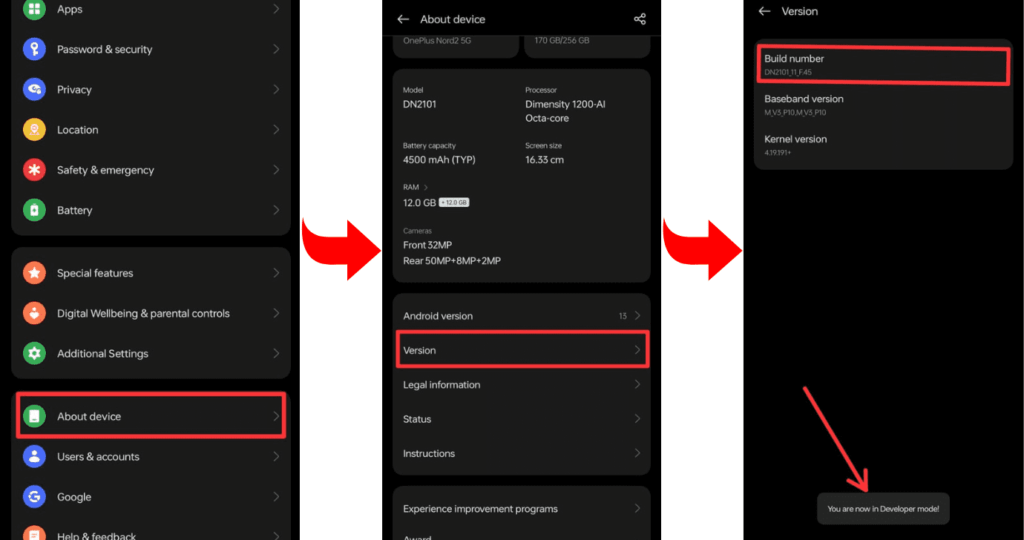
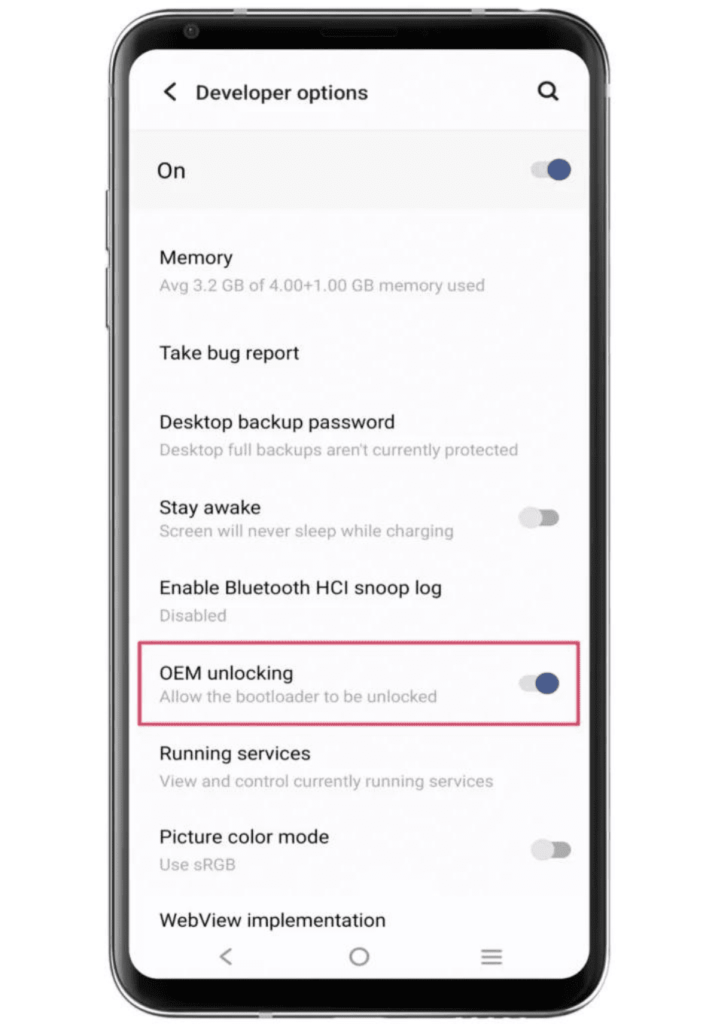
- Go to Settings and select >> “Developers mode” Now find the options >> “OEM Unlocking” and >> “USB Debugging” and enable it.

- Now boot your Redmi 12 5G into bootloader mode to Unlock the Bootloader.
- Connect the phone to the PC or Laptop using a USB cable.
- Type the command “fastboot oem unlock” in the terminal.
After that, the bootloader will now be unlocked on your Redmi 12 5G.
Step 2: Install and flash TWRP custom recovery
- Download the file: Go to the TWRP official website and download the TWRP recovery file for your Redmi 12 5G, according to the model “12 5G” and brand “Redmi” of your device. The file can be a string or in “img” format.
- Boot your phone into bootloader mode: To enter Bootloader Mode, you can press and hold the “Power button” and “Volume Down” buttons of your phone simultaneously. After that, you have to select the option “Bootloader” or “Fastboot” by using the “Volume Up/Down button”.
- Flashing TWRP Recovery: After getting your phone into Fastboot mode, use a USB cable and connect it to your PC.
- Flash the recovery: Now, open the flashing tool on your PC and select the TWRP recovery file of your phone. Select the appropriate option to flash the file, and wait for the process to complete.
The recovery will be successfully flashed. The system and settings on your phone can then be backed up and restored in text mode by restarting your device and entering TWRP recovery.
If you need a TWRP installation guide you can check out our related posts.
Step 3: Get the correct Magisk Zip
You are prepared to flash Magisk files if you have finished installing the TWRP recovery on your Redmi 12 5G. You will receive the most recent version in this section, which will immediately grant you systemless root access.
Download the Magisk Zip by clicking the download button, and follow the instructions carefully to complete the rooting process.
Step 4: Root using Magisk Zip
I hope you already have the Magisk zip file archive from the earlier section. We’ll now begin the Magisk flashing procedure. The user manual’s general instructions are as follows:
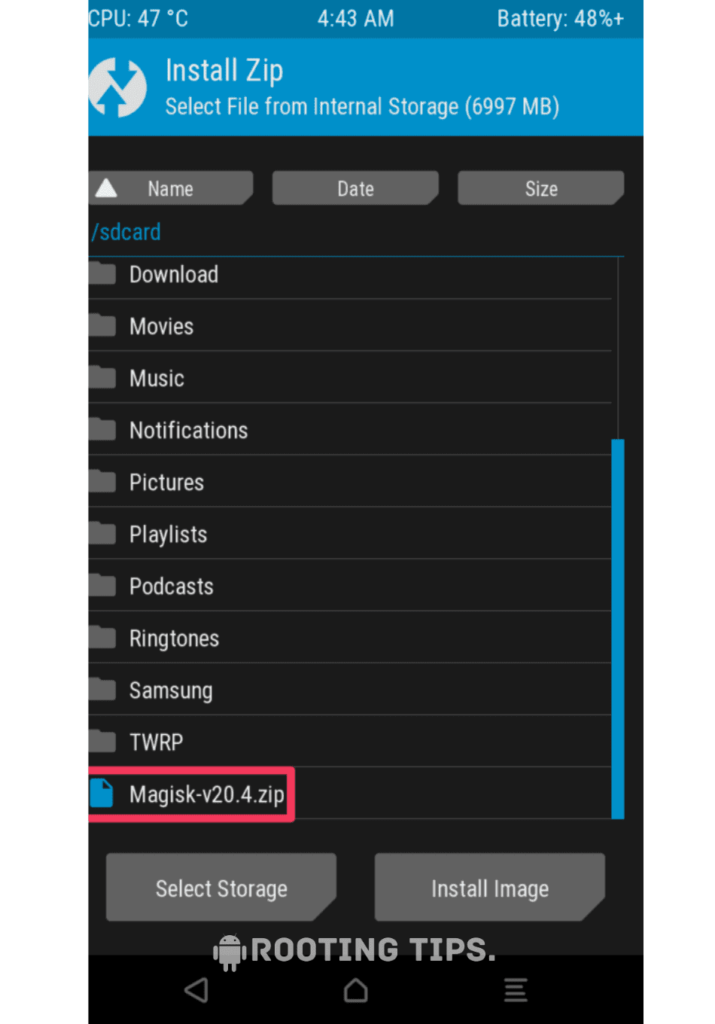
- Let’s start by booting TWRP custom recovery.
- Press on the “Install button” and find the “Magisk file”.

- Select the “.Zip” file from the shown list to open the flashing menu.
- “Swipe right” to start the flashing process.
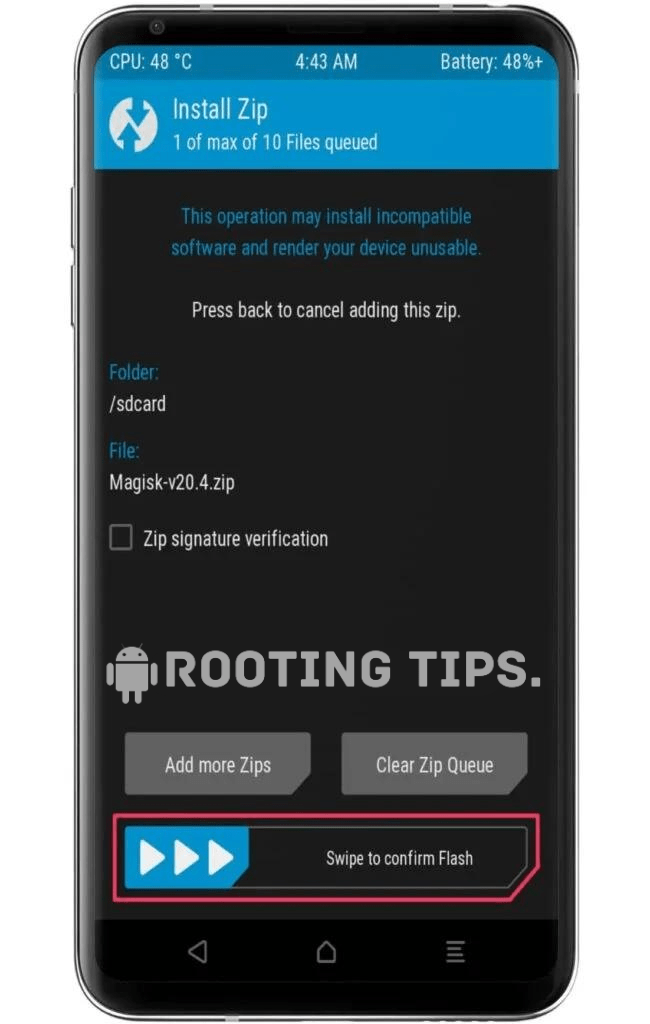
- Reboot your device when the flashing process is complete.
Your Redmi 12 5G has now been successfully rooted. Take advantage of your device’s rooting and customization options.
Method #2: Using the Fastboot and ADB
Here is a second approach to rooting your Redmi 12 5G in case the first method didn’t work for you.
- Go to Settings >> About Phone >> Tap on “Build Number” several times until “Developer Mode” is enabled.
- Access the “Developer option” to Enable “USB debugging” and “OEM Unlocking”.
- Connect your smartphone to the PC or laptop using the “USB Cable”.
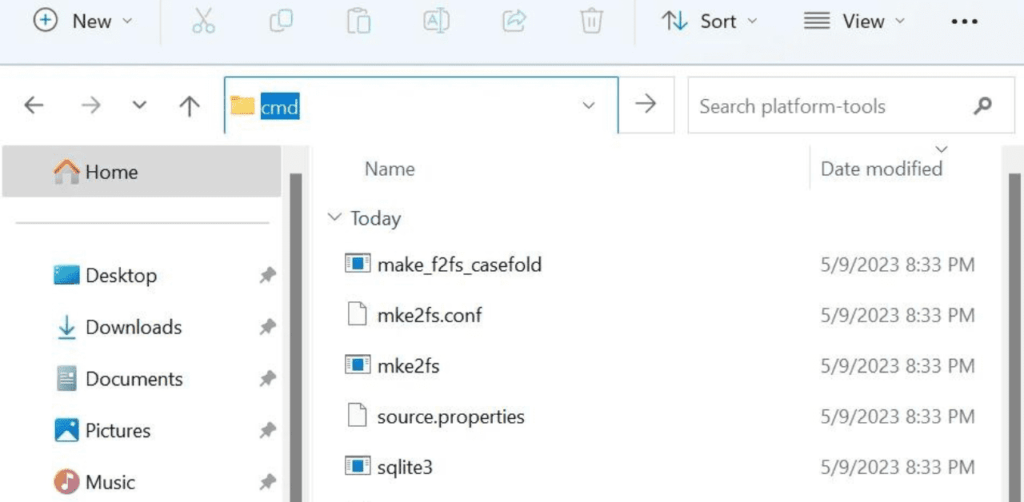
- Open the platform tool folder and type “cmd” in the folder’s search bar.
- A terminal window or command prompt will display on the screen.
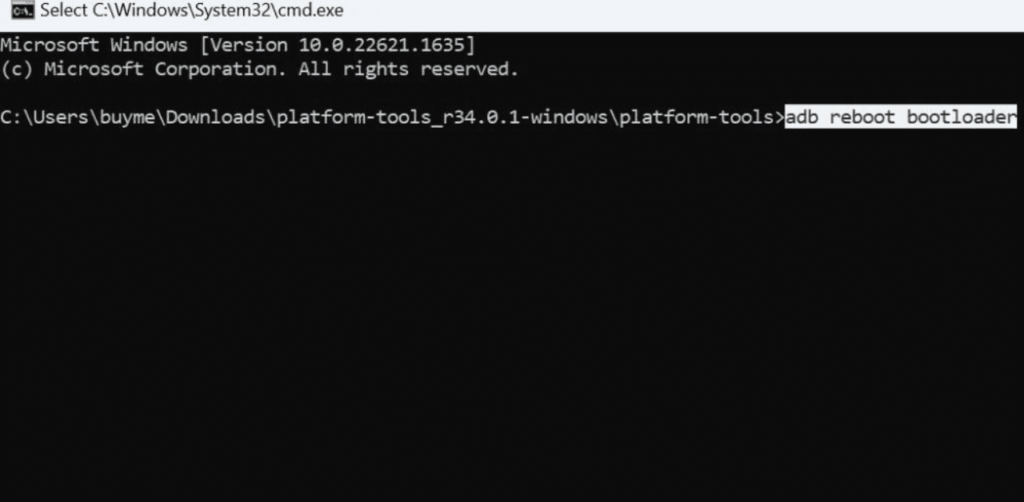
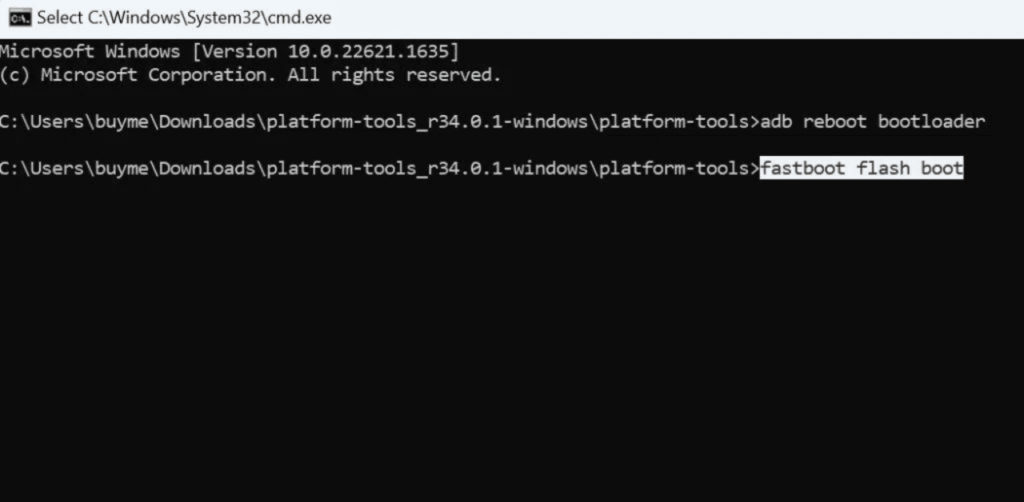
- Now type the first command, “adb reboot bootloader” to boot into the bootloader.
- Finally, type the command “fastboot reboot” to reboot the device.
Now your Redmi 12 5G is successfully rooted. Enjoy the rooting features on your device.
Method #3: Root Redmi 12 5G Without PC
- Download and install the KingoRoot app on your Redmi 12 5G.
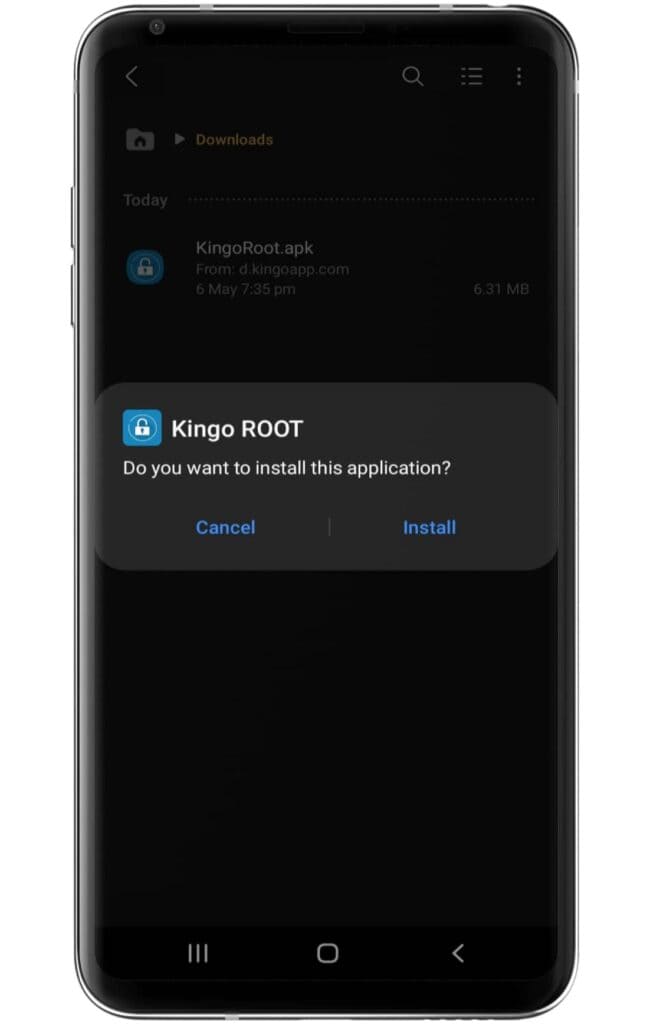
- Make sure to enable the “unknown source” settings on your device.
- Now, open the application and click on the One Click Root option.
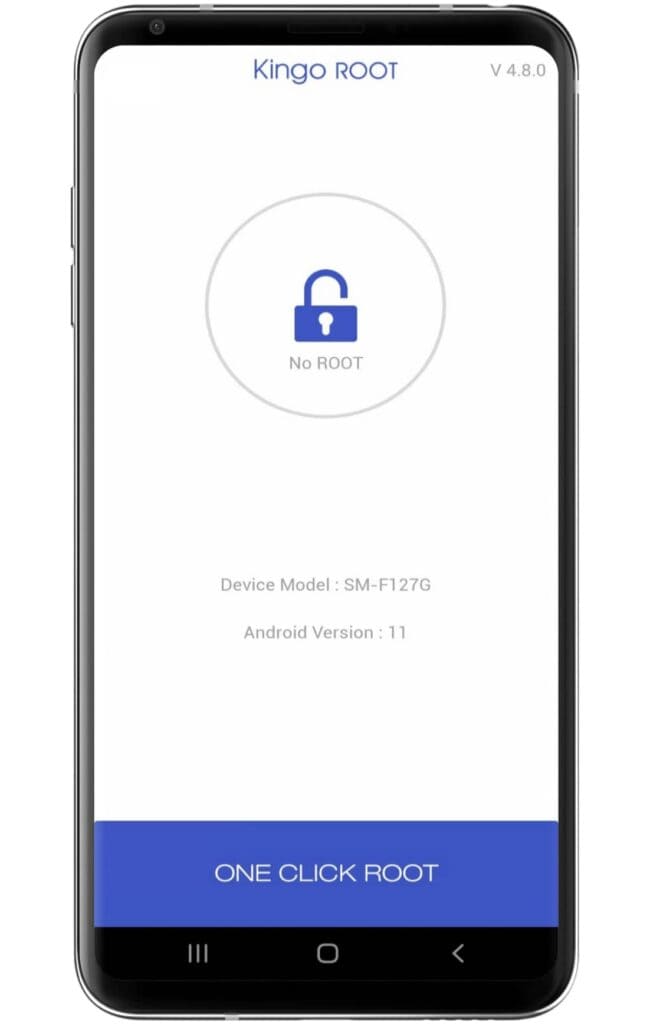
- Wait until the Rooting process ends on the Kingoroot app.
- After completing the process, your Redmi 12 5G has been successfully rooted.
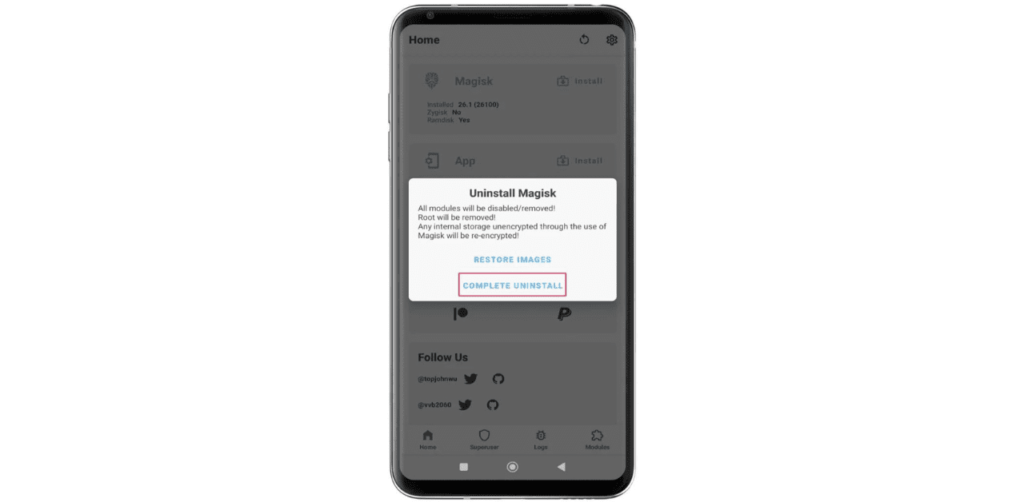
How to uninstall Magisk on Redmi 12 5G?
You can unroot your Redmi 12 5G if you decide you no longer want to utilize root or don’t like it. Your gadget will effortlessly revert to its original state. The methods to unroot your device are shown below.
- Open the Magisk App on your device.
- Go to the “Settings” menu Tap (three horizontal lines) in the upper-left corner, and then select “Settings”.
- Scroll down in the Settings menu and tap the “Uninstall” button.
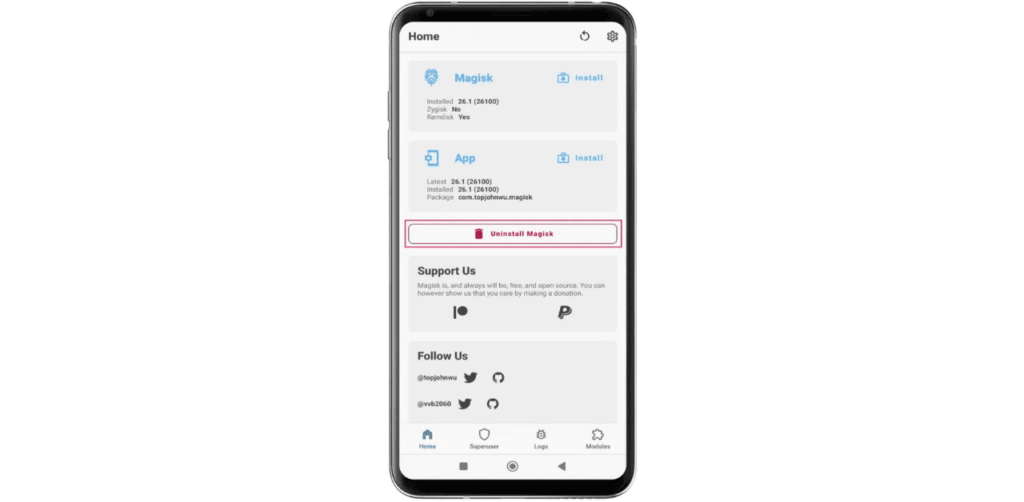
- Follow the prompts to “Uninstall Magisk” and Restore your device to its original, unrooted state.
The Redmi 12 5G has now been successfully unrooted. Download the root checker app to check the state of your device.
Frequently Asked Questions (FAQs)
Ans. Yes, Redmi phones can be rooted, but the process may void the warranty and pose security risks. Rooting allows access to system files, customization, and apps, but should be done cautiously.
Ans. Yes, a rooted phone can be unrooted by reversing the rooting process through software or firmware updates, restoring the original system files, and removing superuser access, returning the device to its unrooted state.
Ans. Rooting a device can be risky, voiding warranties and exposing it to security vulnerabilities. It offers more control but requires caution and technical know-how.
Conclusion
So, friends, if you have come to the end of this article, then it means that you have rooted your Redmi 12 5G with the method we have mentioned or are thinking of doing it. You can easily root your device by following the steps given by us. If you have any kind of rooting problem, then you can tell us in the comment, and we will try to solve your problem. Thanks for reading to the end.