Hello friends, Are you looking for a way to root your Samsung Galaxy A11? If your answer is yes, then you have come to the right place. In this article, we are going to tell you the easy and safe way to root your Samsung Galaxy A11. You can customize and optimize as you want, and rooting will give you access to your secret settings. Stay till the end for more information about rooting.
What is root?
Getting superuser or administrative access to an Android smartphone’s operating system is referred to as rooting the device. This gives users total control over the hardware and software of the device, enabling them to access capabilities that are often forbidden by the manufacturer or carrier and make modifications at the deepest levels.
Consider acquiring administrator rights on a computer as being similar to rooting. When you root an Android device, you may do things that are otherwise not feasible, such as remove pre-installed bloatware, customize the user interface, overclock or underclock the processor, and even run specialized programs that need higher rights.
Advantages or Benefits of rooting
- Removal of Unwanted Apps: Rooting allows you to remove unwanted apps from your device, which are basically prohibited, and can save space and system resources.
- Backup and Restore: Rooting allows you to back up all of your device’s data and restore it when necessary.
- Custom Recoveries and ROMs: Rooting allows you to install custom recoveries, allowing you to flash your device into a new operating system (ROM).
- Overclocking: On rooted devices, you can increase the performance of your hardware by overclocking it.
- Advanced Applications: Some applications that require root access can only work on rooted devices.
Disadvantages or Cons of Rooting
- Possibility of Bricking: If there is any mistake in the rooting process, your device may get bricked, causing it to not work at all.
- Problems with Official Updates: When you root your device, you may have trouble installing official operating system updates on your device.
- Operating System Instability: After rooting, the stability of the operating system may be affected, and uncontrolled changes may occur in the device, which may adversely affect the performance of the device.
- Battery Management Problem: Some rooted devices may have applications that consume a lot of battery, which can reduce battery life.
- Applications may be untrustworthy: There may be some applications on rooted devices that may compromise the security and privacy of your data.
Pre Requirements:
- Battery charge: That’s important; your device’s battery health should be above 80%. so that your battery health doesn’t get drained during rooting.
- Data Backup: Rooting has the potential to corrupt important data on your device. Therefore, it is necessary that you keep the important data on your device in a safe place.
- Internet access: Make sure that you have Internet access while rooting because you need to download the unlock tool and other things.
- Device version check: Before rooting, make sure to check the model number and version of your device. It is important to know how to download the correct rooting method and files for your device.
- Valid USB Drivers and Cable: Install the valid USB drivers for your device on your PC and choose an original USB cable. which will help you connect your phone to your PC.
Let’s Root Samsung Galaxy A11
Generally, we discuss two ways to root your Samsung Galaxy A11. Which are described below in detail. Method #1: Using the TWRP Custom Recovery; Method #2: Using Fastboot and ADB Method #3: Root Samsung Galaxy A11 Without PC But before rooting it is necessary to fulfill the pre-requisites. Let’s get started.
Warning:- Rooting voids your device warranty and increases security risks on your device. So root your device at your own risk.
Method #1: Using the TWRP Custom Recovery
Here is a common method to root your Samsung Galaxy A11: Through TWRP Custom Recovery, follow the steps carefully to root your device successfully.
Step 1: Unlock the bootloader
- Enable Developer Options: Go to device Settings, scroll down, and tap on >> “About phone” >> then tap on >> “Build number”, several times until >> “Developer Options” is activated.
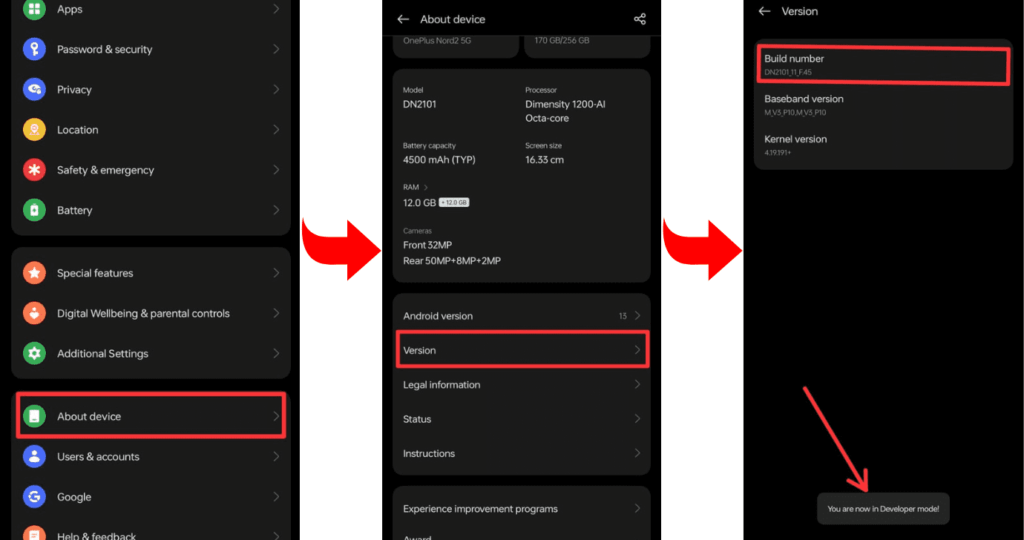
- Go to Settings and select “Developers Mode” Now find the options “OEM Unlocking” and “USB Debugging” and enable them.

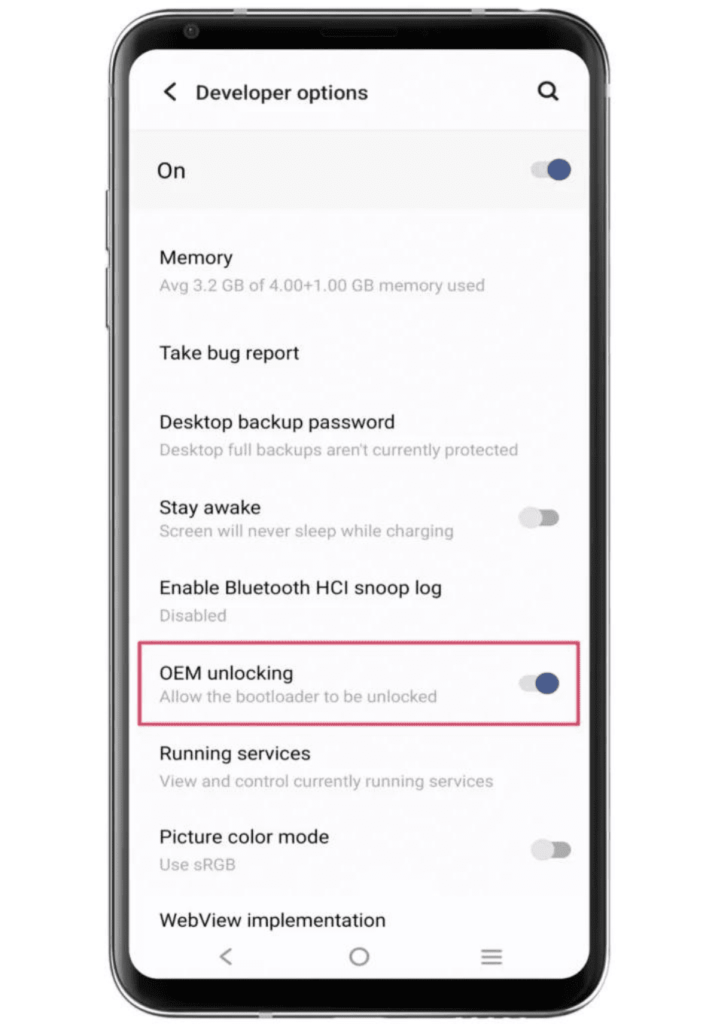
- Now boot your Samsung Galaxy A11 into bootloader mode to Unlock the Bootloader.
- Connect the phone to the PC or laptop using a USB cable.
- Type the command “fastboot oem unlock” in the terminal.
Step 2: Install and flash TWRP custom recovery
- Download the file: Go to the TWRP official website and download the TWRP recovery file for your Samsung Galaxy A11, according to the model “Galaxy A11” and brand “Samsung” of your device. The file can be a string or in “img” format.
- Boot your phone into bootloader mode: To enter bootloader mode, you can press and hold the “Power button” and “Volume Down” buttons of your phone simultaneously. After that, you have to select “Bootloader” or “Fastboot” by using the “Volume Up/Down button”.
- Flashing TWRP Recovery: After getting your phone into Fastboot mode, use a USB cable and connect it to your PC.
- Flash the recovery: Now, open the flashing tool on your PC and select the TWRP recovery file on your phone. Select the appropriate option to flash the file, and wait for the process to complete.
If you need a TWRP installation guide, check out our related posts.
Step 3: Get the correct Magisk Zip
We told you in the previous step that you have to do TWRP flashing. If you haven’t done it, do it now. If we are assuming that you completed the TWRP flashing process on your Samsung Galaxy A11, then you are ready to flash the Magisk Zip file. So now you can download the Magisk zip file, which is given below.
Step 4: Root using Magisk Zip
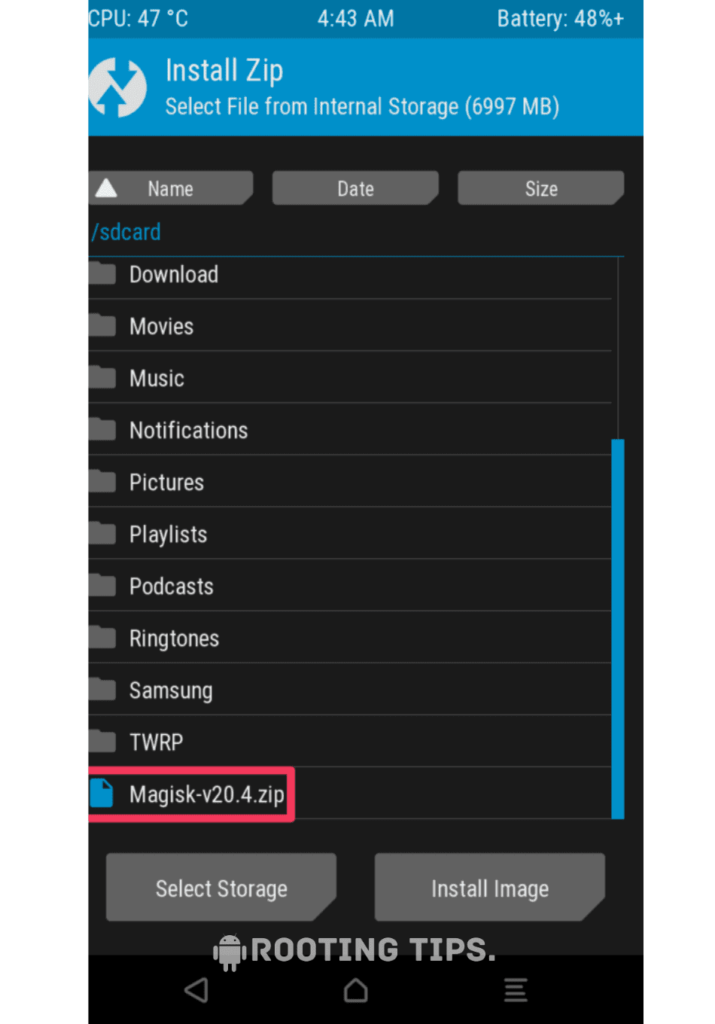
- Let’s start by booting TWRP Custom Recovery.
- Press the “Install button” and find the “Magisk file”.

- Select the “.Zip” file from the shown list to open the flashing menu.
- “Swipe right” to start the flashing process.
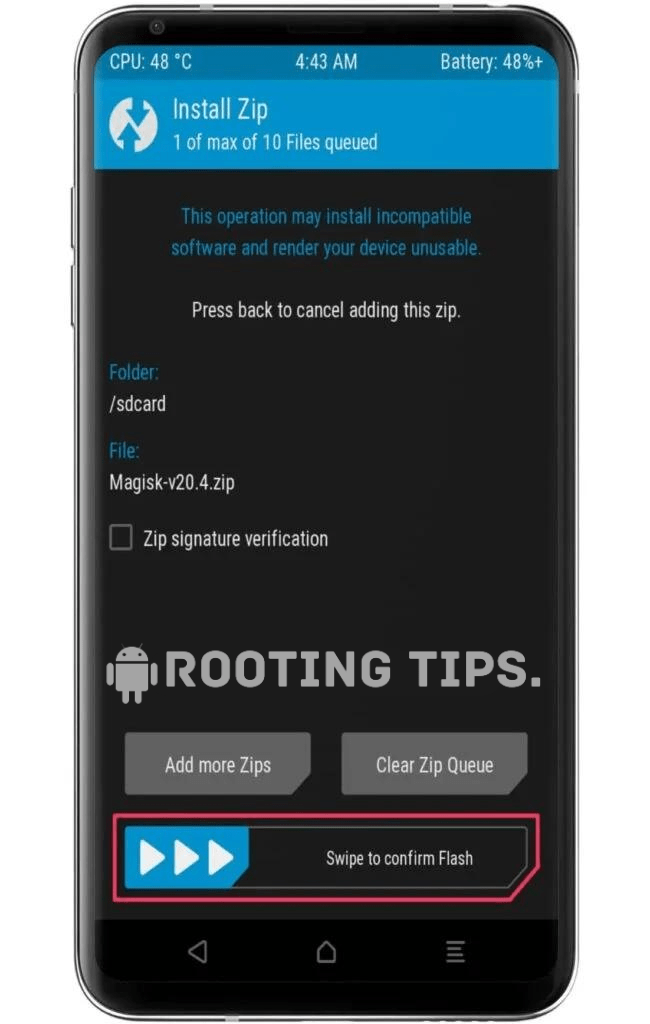
- Reboot your device when the flashing process is complete.
BOOM! Now you can use all the rooting services on your Samsung Galaxy A11. Your device is successfully rooted.
Method #2: Using Fastboot and ADB
Download platform tools and ADB drivers for your PC or laptop.
- Go to Settings >> About Phone >> Tap on “Build Number” several times until “Developer Mode” is enabled.
- Access the “Developer option” to enable “USB debugging” and “OEM Unlocking”.
- Connect your smartphone to the PC or laptop using the “USB Cable”.
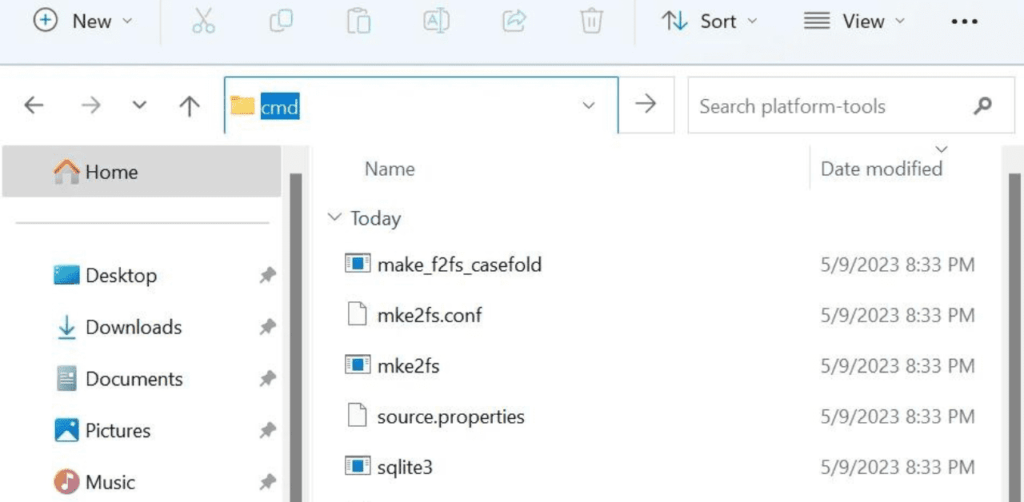
- Open the platform tool folder and type “cmd” in the folder’s search bar.
- A terminal window or command prompt will display on the screen.
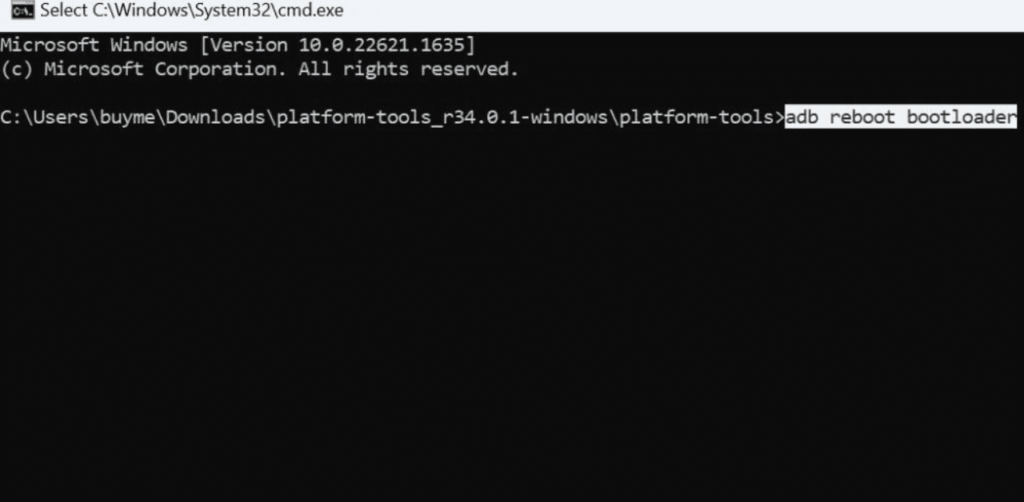
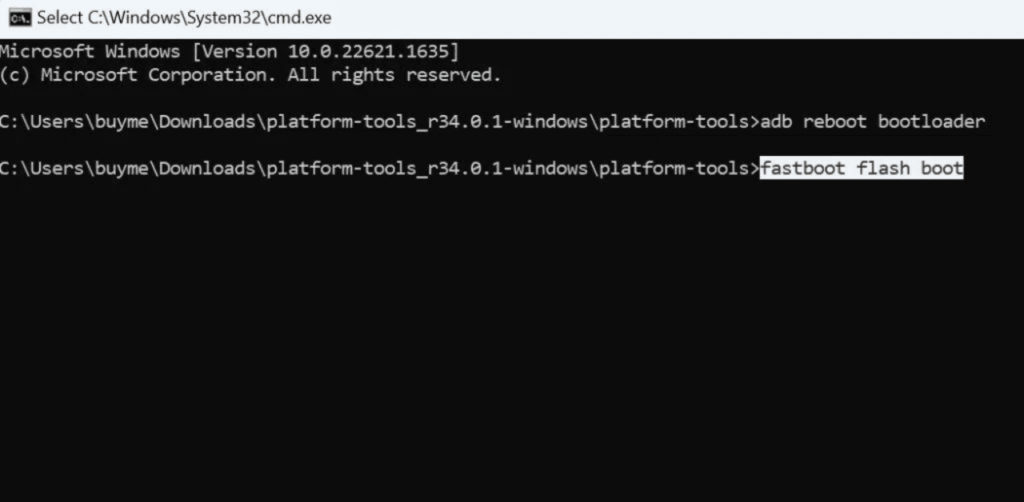
- Now type the first command, “adb reboot bootloader” to boot into the bootloader.
- Finally, type the command “fastboot reboot” to reboot the device.
Method #3: Root Samsung Galaxy A11 Without PC
- Download and install the KingoRoot app on your Samsung Galaxy A11.
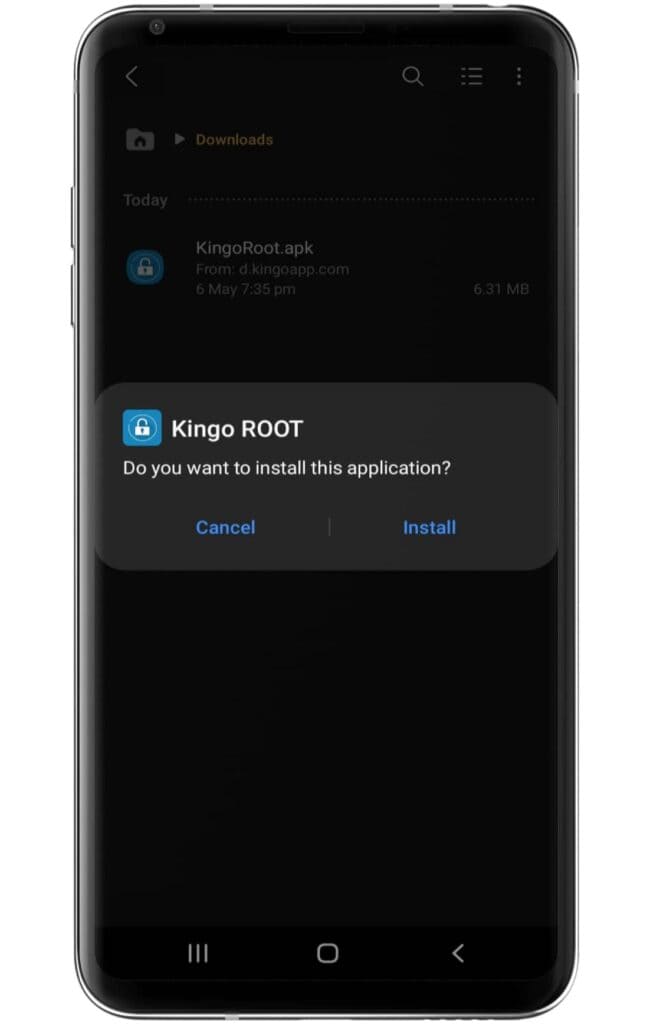
- Make sure to enable the “unknown source” settings on your device.
- Now, open the application and click on the One-Click Root option.
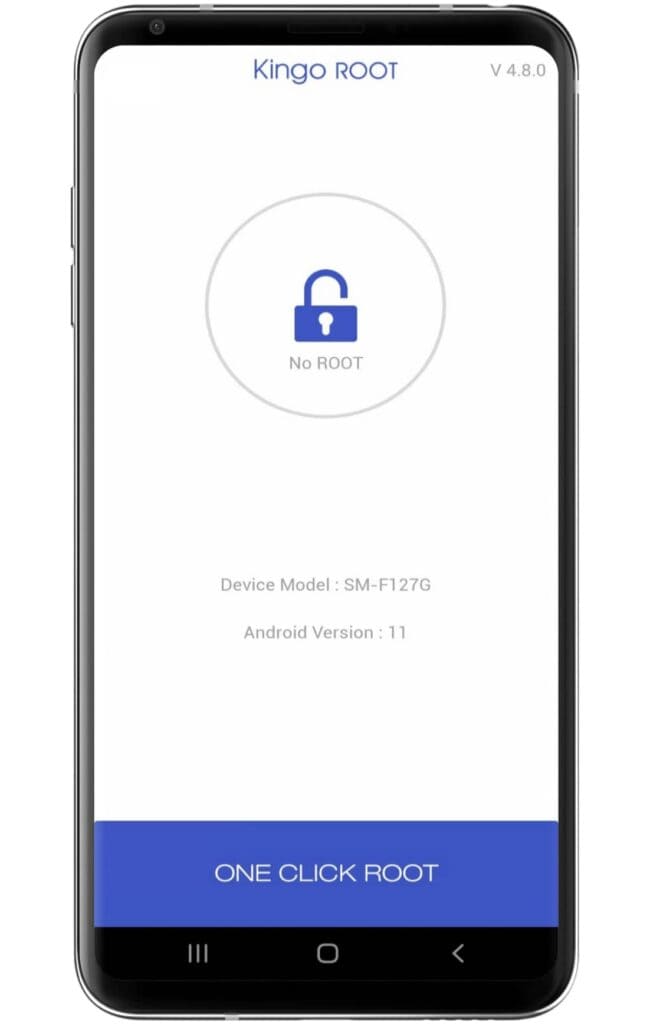
- Wait until the rooting process ends on the Kingoroot app.
- After completing the process, your Samsung Galaxy A11 has been successfully rooted.
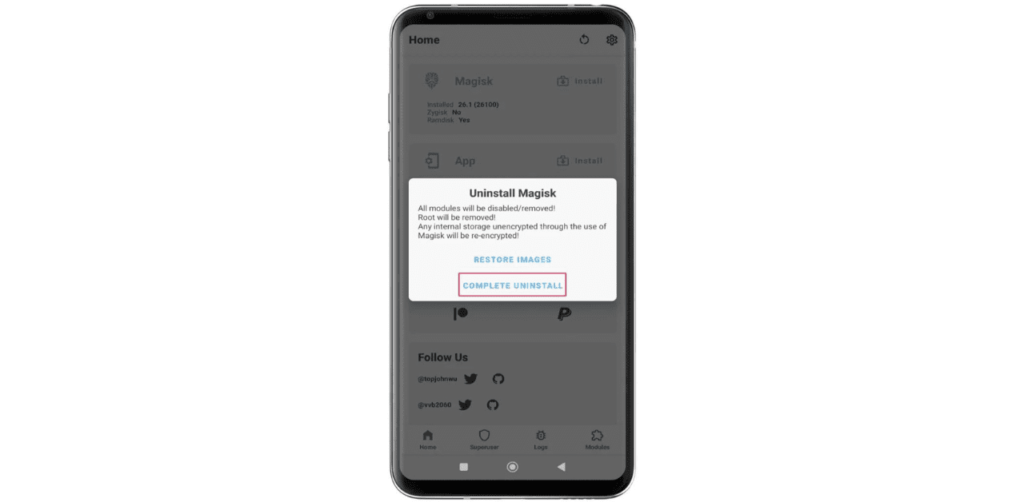
How to uninstall Magisk on Samsung Galaxy A11?
Here are some general steps to unroot your Samsung Galaxy A11: If at any time you want to unroot your device, then simply follow the steps to unroot your device.
- Open the Magisk App on your device.
- Go to the “Settings” menu Tap (three horizontal lines) in the upper-left corner, and then select “Settings”.
- Scroll down in the Settings menu and tap the “Uninstall” button.
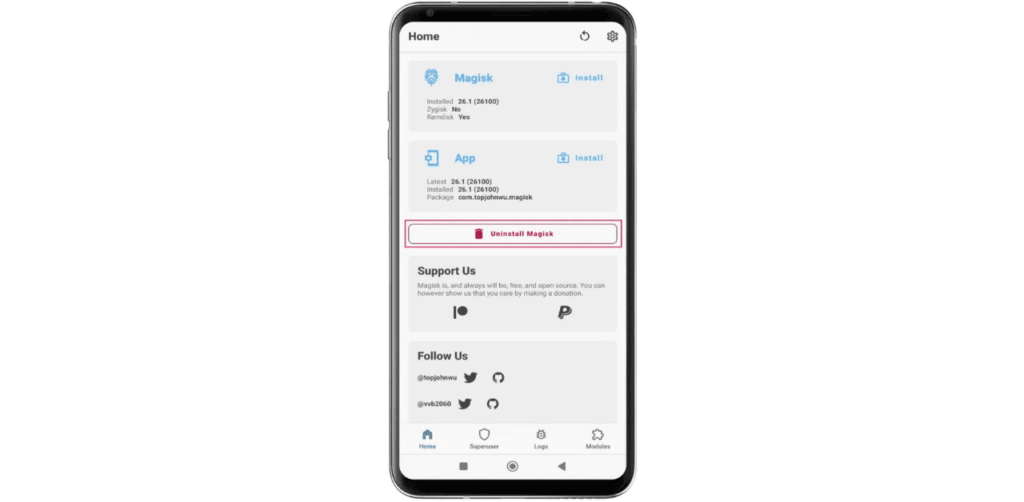
- Follow the prompts to “Uninstall Magisk” and restore your device to its original, unrooted state.
Frequently Asked Questions (FAQs)
Ans. Yes, users can acquire privileged access for customizations via rooting Samsung devices with Snapdragon CPUs. The procedure could, however, nullify the guarantee and compromise security. Exercise caution and be sure you abide by trustworthy instructions.
Ans. When you unroot your Samsung phone, the operating system’s administrator-level access (root) is removed, returning it to its default settings. While some root-only apps and personalization are lost through this process, security and stability are improved. However, the warranty is void. Back up your data before unrooting.
Ans. Due to hardware restrictions, a rooted phone cannot expand its physical RAM capacity. Although this doesn’t really add more RAM, root access may allow you to manage apps more effectively or use virtual RAM techniques to optimize RAM utilization.
Conclusion
So, friends, if you want to root your Samsung Galaxy A11, then you can easily do so by following the steps mentioned by me if you do not understand any of the steps mentioned by us or are facing problems while rooting. You can tell from the comment that we will give a high-quality answer to your problem. Thank you for reading our article to the end