Hello friends, If you have come to our article, then your time will not be wasted. Today we are going to tell you the easy and safe method to root your Samsung Galaxy A12. You can easily root it by following the steps. You can customize and optimize the phone’s settings as per your wishes. In this article, information about the advantages and disadvantages of root will also be found.
What is root?
Rooting an Android device refers to the process of gaining superuser or administrative access to the device’s operating system. This allows users to access and modify system files, settings, and functionalities that are normally restricted by the manufacturer.
It’s akin to having ‘root’ privileges in a Unix-like system. Rooting can provide greater control and customization options, but it also comes with potential risks, such as voiding warranties, security vulnerabilities, and instability. It’s important to approach rooting with caution and awareness of the potential consequences.
Advantages or Benefits of rooting
- Personalization and More Privacy: Rooting allows you to access the applications installed on your device and access their data, thus increasing your privacy.
- Automation and Scripting: On rooted devices, you can automate tasks using automation apps and scripting. This helps simplify your daily tasks.
- Improvement of Battery and Performance: By rooting, you can improve device performance and also extend battery life by closing unwanted applications and processes.
- Upgrade and Downgrade: On rooted devices, you can upgrade or downgrade your OS, allowing you to enjoy the latest features or go back to an older OS.
- Ad-Blocking and Customization: Rooting allows you to block ads and customize your interface on your device by installing ad-blocking software.
- Freedom to Exploit: Rooting allows you to use your device more freely, such as by changing the transparency of your device or removing system-level limitations.
Disadvantages or Cons of Rooting
- Loss of Warranty: Rooting may void your device’s warranty at any time. The company can’t help you if your phone goes through a technical issue because you’ve rooted it.
- Lack of Security: Rooting can reduce the security of your device. A rooted device is more vulnerable to threats, such as viruses, malware, and unauthorized apps.
- System Stability Issues: Rooting may cause changes to your device’s system files, which may inadvertently affect system stability. This can cause your phone to crash or hang.
- Disable Automatic Updates: When your device is rooted, you may have issues with the operating system and security updates.
- Bricking Risk: If you root the wrong way, your device can be at risk of bricking, causing it to not work fully.
Pre Requirements:
- Battery charge: The device’s battery health should be above 90% at the time of rooting. So that your device’s battery does not get drained.
- Data Backup: Rooting can corrupt the device’s data. Therefore, you must keep the important data on your device in a safe place.
- Correct USB Drivers and Cable: Install the valid USB drivers for your device on your PC and choose an original USB cable. This will help you connect your phone to the PC properly.
- Internet access: Firstly, check your internet, because you will need internet access. To download the unlock tool and other stuff.
- Device version check: Make sure to check your device’s model number and version. It’s important to download the correct rooting method and files for your device.
Let’s Root Samsung Galaxy A12
We cover three techniques that are fully described here for rooting your Samsung Galaxy A12. Method #1: Root Samsung Galaxy A12 Without PC Method #2: Using the TWRP Custom Recovery and Method #3: Using Fastboot and ADB
Warning:- Note that rooting may void your device’s warranty and may cause some device issues with the help of untrusted elements. So, be careful and root your device at your own risk.
Method #1: Root Samsung Galaxy A12 Without PC
- Download and install the KingoRoot app on your Samsung Galaxy A12.
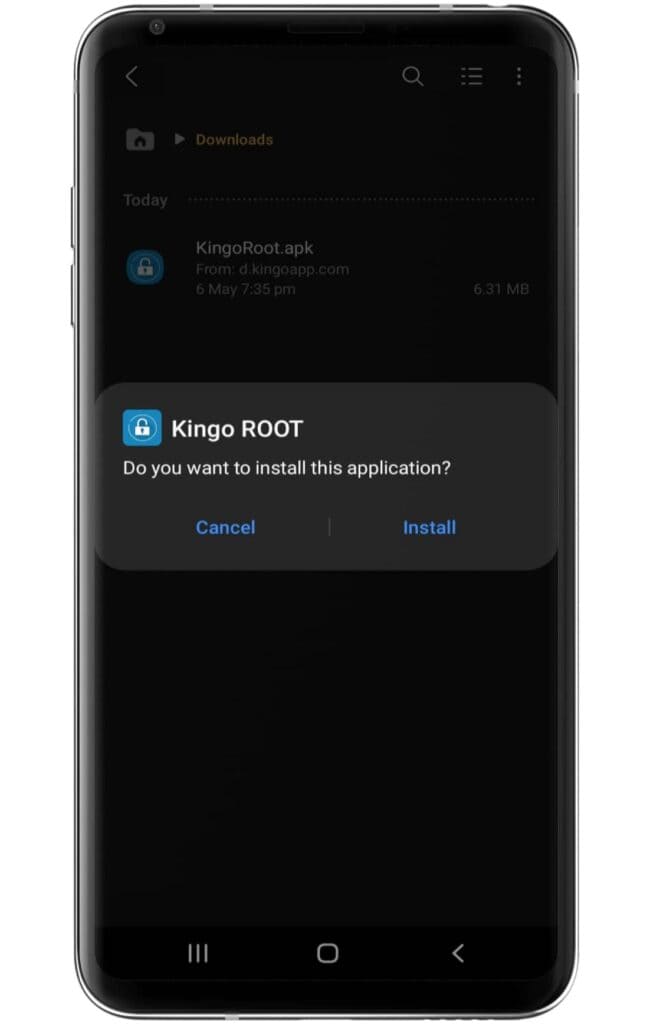
- Make sure to enable the “unknown source” settings on your device.
- Now, open the application and click on the One-Click Root option.
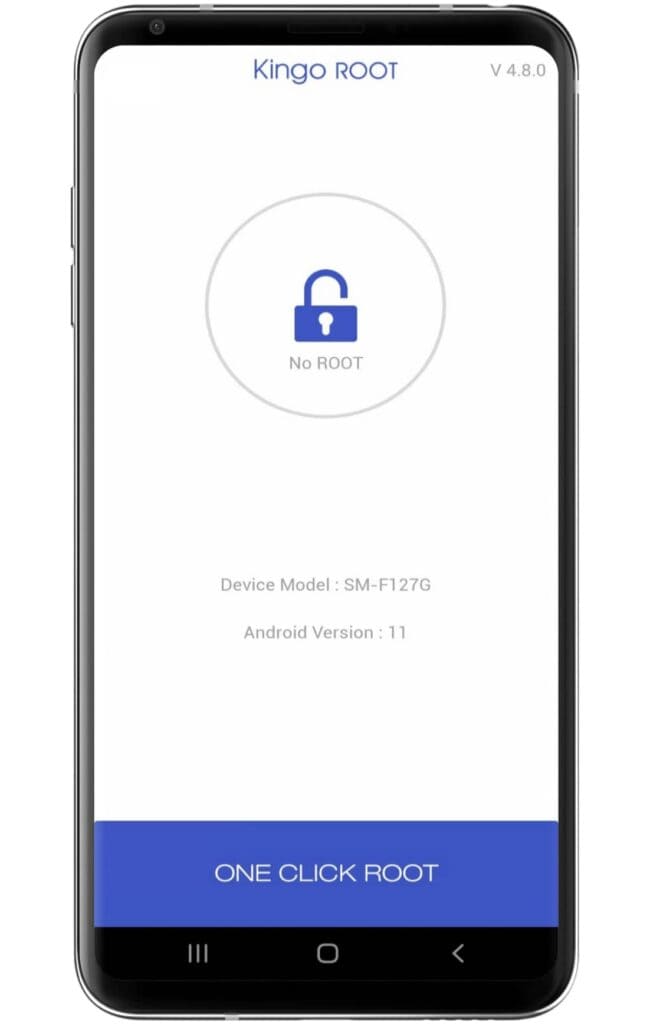
- Wait until the rooting process ends on the Kingoroot app.
- After completing the process, your Samsung Galaxy A12 is successfully rooted.
Method #2: Using the TWRP Custom Recovery
Step 1: Unlock the bootloader
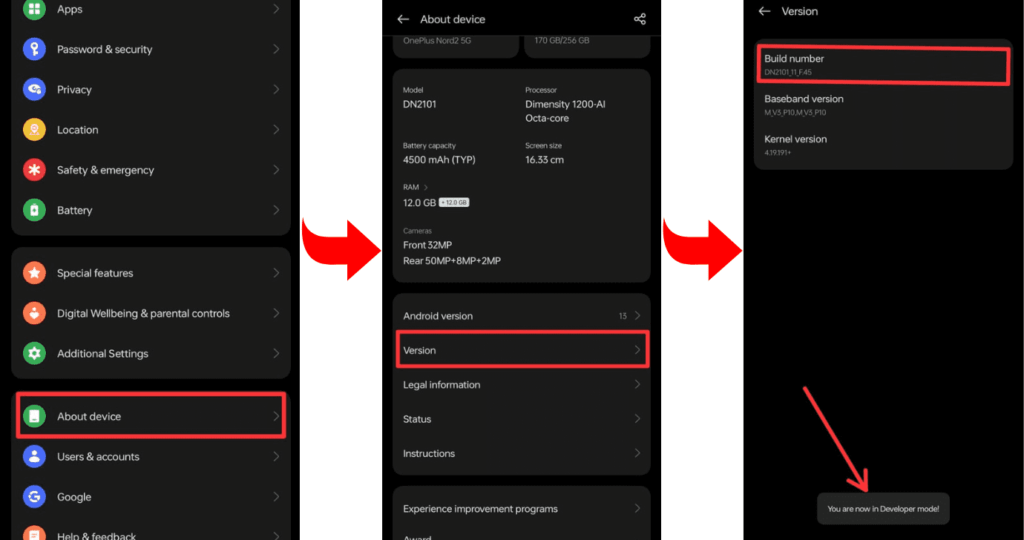
- Enable Developer Options: Go to device Settings, scroll down, and tap on “About phone” then tap on “Build number”, several times until “Developer Options” is activated.
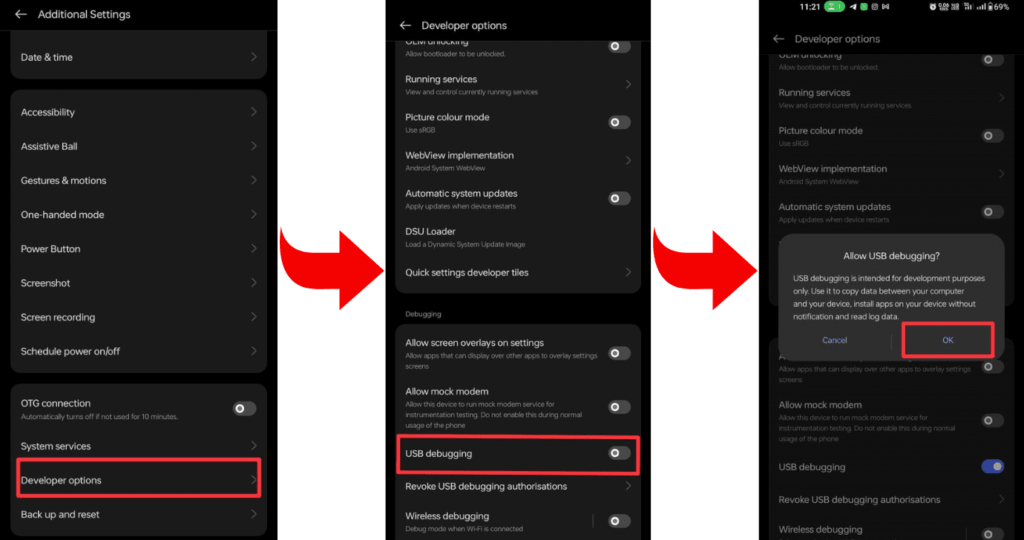
- Go to Settings and select “Developers Mode.” Now find the options “OEM Unlocking” and “USB Debugging” and enable them.
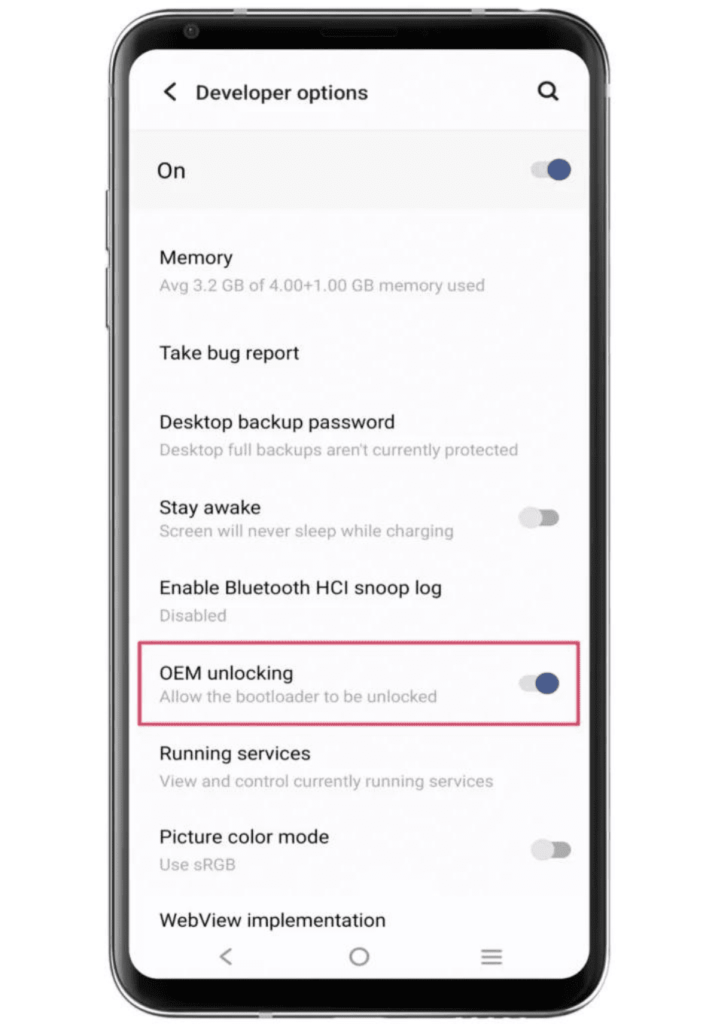
- Now boot your Samsung Galaxy A12 into bootloader mode to unlock the bootloader.
- Connect the phone to the PC or laptop using a USB cable.
- Type the command “fastboot oem unlock” in the terminal.
Step 2: Install and flash TWRP custom Recovery
- Download the file: Go to the TWRP official website and download the TWRP recovery file for your Samsung Galaxy A12, according to your device’s model “A12” and brand “Samsung”. The file can be a string or in “IMG” format.
- Boot your phone into bootloader mode: To enter bootloader mode, you can press and hold the “Power button” and “Volume Down” buttons of your Samsung Galaxy A12 simultaneously. After that, you have to select “Bootloader” or “Fastboot” by using the “Volume Up/Down button”.
- Flashing TWRP Recovery: After getting your phone into Fastboot mode, use a USB cable and connect it to your PC.
- Flash the recovery: Now, open the flashing tool on your PC and select the TWRP recovery file on your phone. Select the appropriate option to flash the file, and wait for the process to complete.
If you need a TWRP installation guide, you can check out our related posts.
Step 3: Get the correct Magisk Zip
You have to do TWRP flashing. If you haven’t done it, then do it now. So we are assuming that you have completed your TWRP flashing process on your Samsung Galaxy A12, and then you are ready to flash the Magisk Zip file. So now you can download the Magisk zip file, which is given below.
Step 4: Root using Magisk Zip
- Let’s start by booting TWRP Custom Recovery.
- Press the “Install button” and find the “Magisk file”.
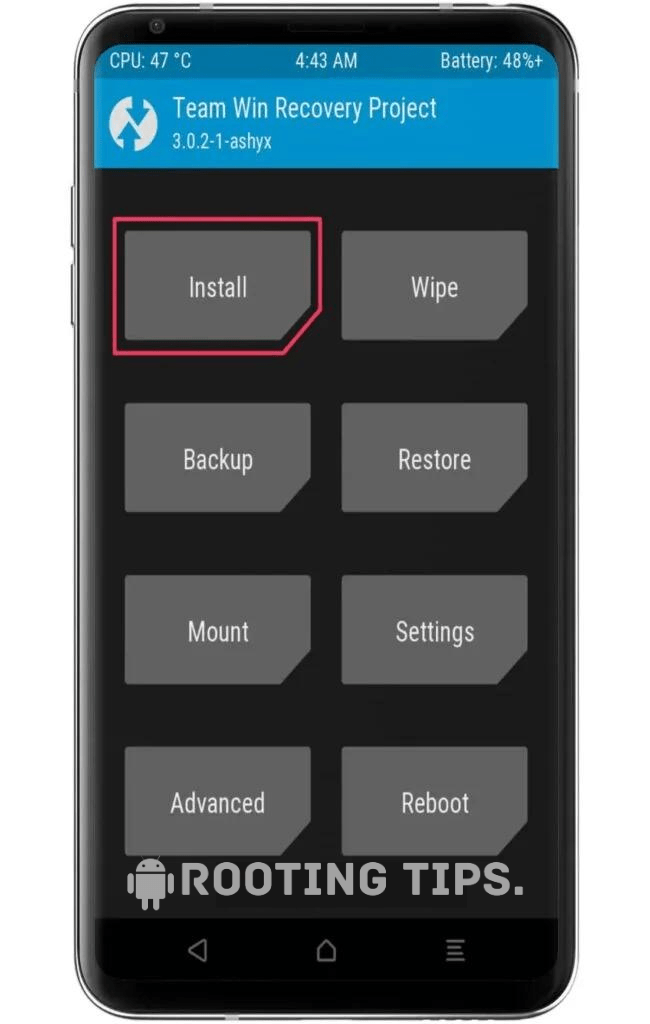
- Select the “.zip” file from the shown list to open the flashing menu.

- “Swipe right” to start the flashing process.
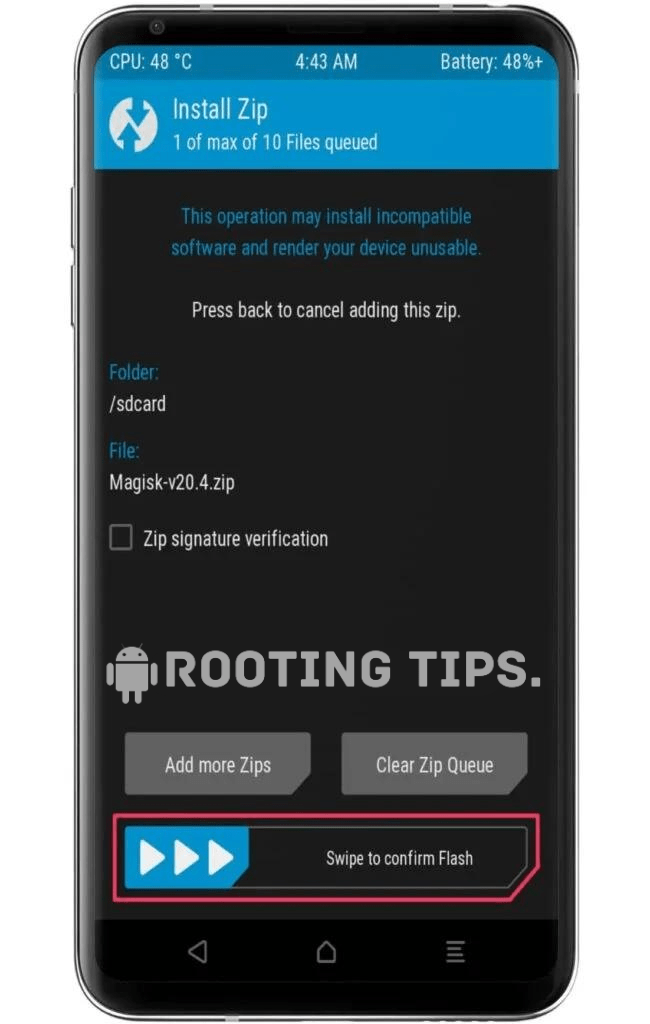
- Reboot your device when the flashing process is complete.
Now you can use the full potential of your Samsung Galaxy A12. Your device has been rooted successfully.
Method #3: Using Fastboot and ADB
Download platform tools and ADB drivers for your PC or laptop.
- Go to Settings >> About Phone >> Tap on “Build Number” several times until “Developer Mode” is enabled.
- Access the “Developer option” to enable “USB debugging” and “OEM unlocking.”.

- Connect your smartphone to the PC or laptop using the “USB Cable”.
- Open the platform tool folder and type “cmd” in the folder’s search bar.
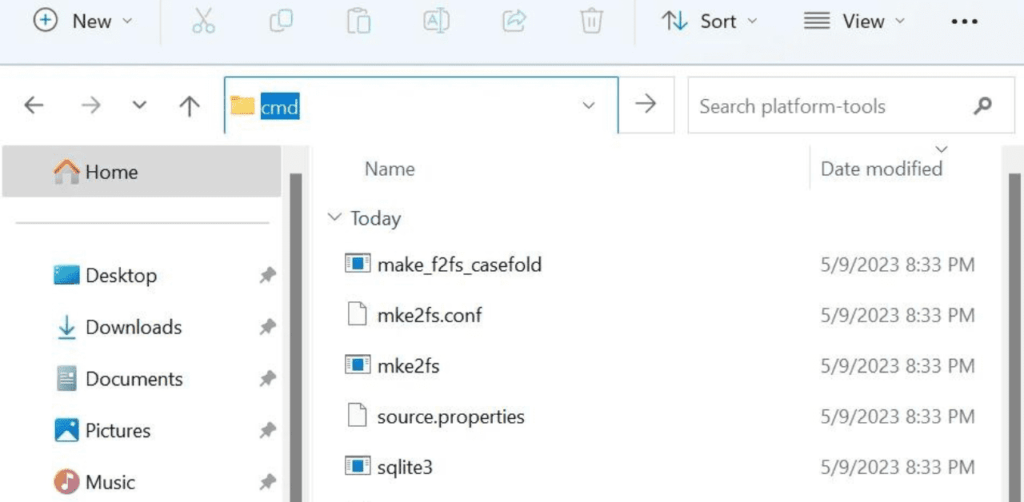
- A terminal window or command prompt will display on the screen.
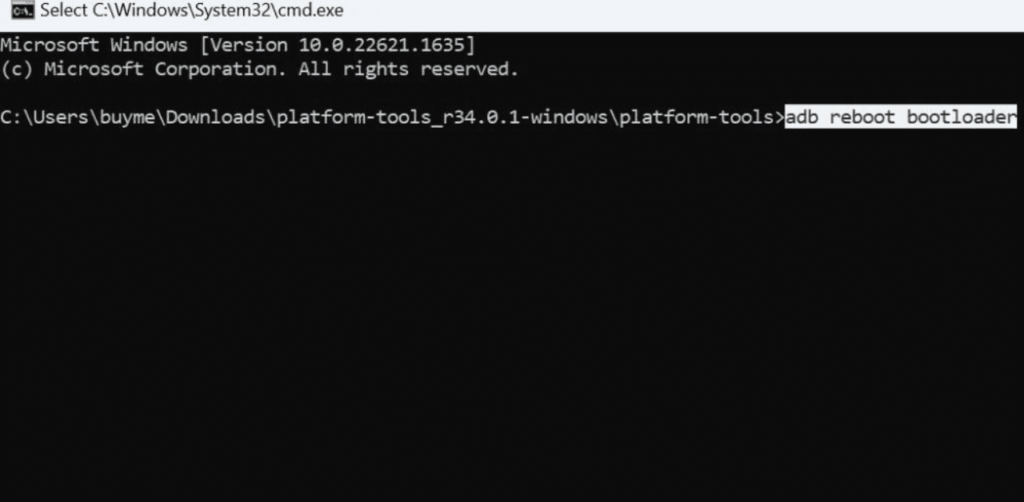
- Now type the first command, “adb reboot bootloader”. to boot into the bootloader.
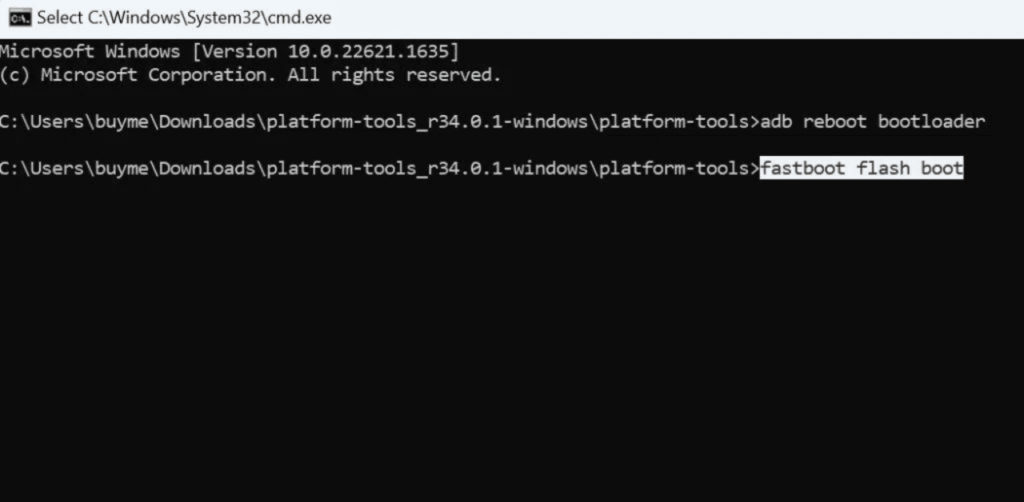
- Now, enter the command “fastboot flash boot” and choose Magisk_file.zip. then hit Enter to start the flashing process on your device.
- Finally, type the command “fastboot reboot” to reboot your Samsung Galaxy A12.
How to uninstall Magisk on Samsung Galaxy A12?
On your Samsung Galaxy A12, you are always free to remove Magisk. The methods listed below must be properly followed to remove Magisk.
- Open the Magisk app on your device.
- Go to the “Settings” menu Tap (three horizontal lines) in the upper-left corner, and then select “Settings”.
- Scroll down in the Settings menu and tap the “Uninstall” button.
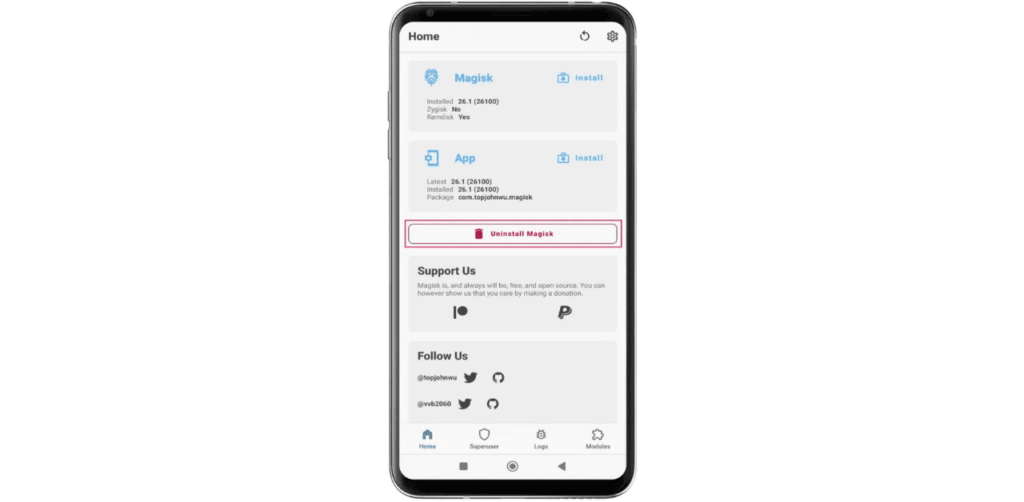
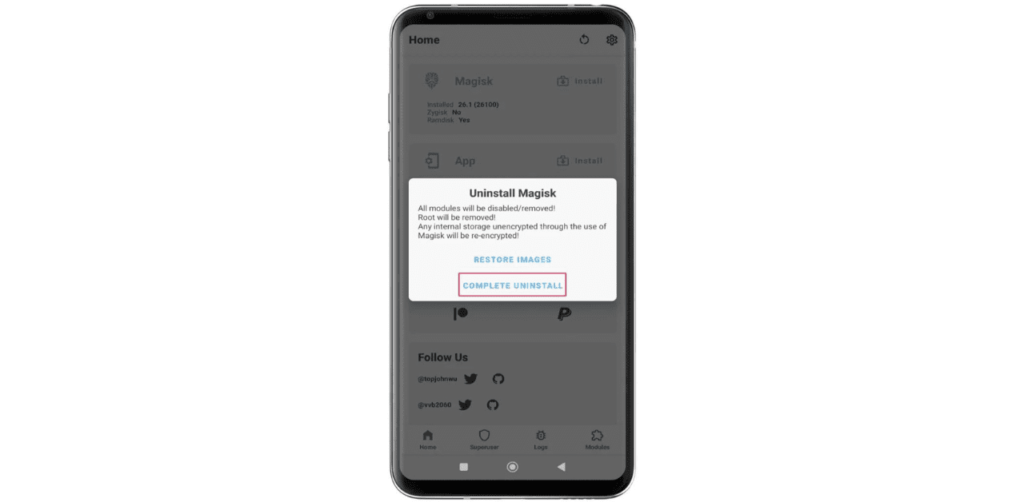
- Follow the prompts to “uninstall Magisk” and restore your device to its original, unrooted state.
Frequently Asked Questions (FAQs)
Ans. Yes, uninstalling Magisk will remove root access from your device.
Ans. Possibly, but rooting older phones carries risks. It can void warranties and expose devices to security vulnerabilities. Proceed with caution and research specific instructions for your phone model.
Ans. Yes, Samsung devices can be rooted. Rooting grants users elevated privileges, enabling customization and access to system files. However, it voids warranties and poses security risks.
Conclusion
So, friends, you have reached the end of this article, and I hope that you have easily rooted your Samsung Galaxy A12 by following the steps given by us. If you still have any problems, then you can comment in the comment box. Or you can tell us by mail; we will try to give you the best answer to your problem. Keep in mind the things we tell us while rooting, and if you like our article, then you can make a lovely comment for us.